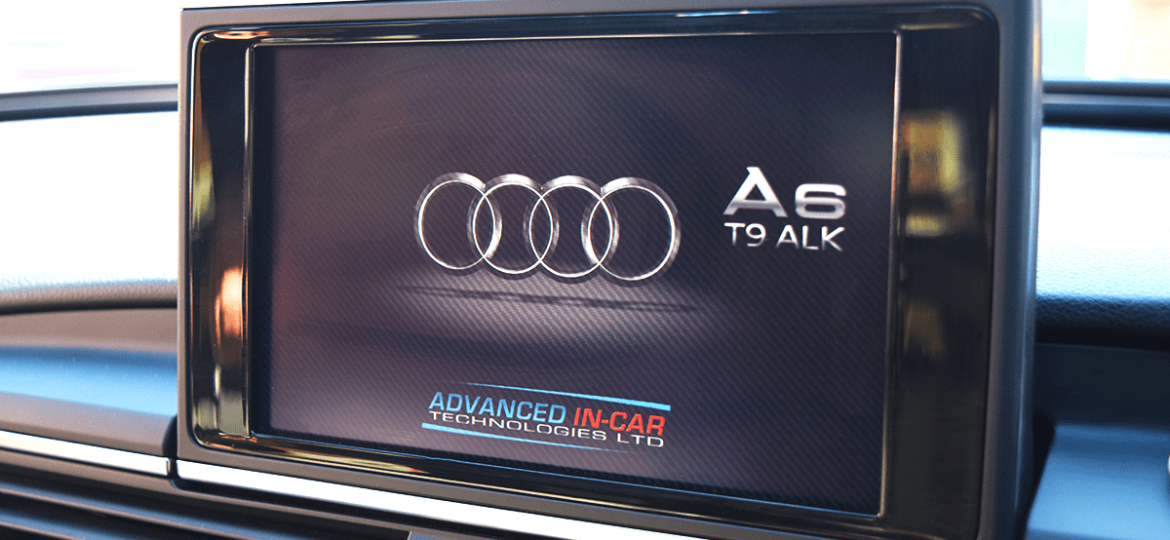
Have you ever found yourself looking randomly on the internet for cool tips and tricks for you car? Slightly wanting to push the boundaries of what your car came with? Well hopefully this will be one of those such posts. Whilst researching into MMI Hardware I came across a way on how to change the Splash Screen on the MMI System!
Now I’ve only tried and tested on a 2014 Audi A6 (4G) here but my guess is that if you have MMI 3G or 3G+ then then the process should be very similar! You will need VCDS or VAG-COM (Shameless link to purchase a Genuine one here).
I’m going to try and do it Step-By-Step as I’ve taken bits of info from across the net on what you need to do. There may be lots of steps but it’s really broken down to try and help you do it. There is also a brief video showing the “Car Side” in action. I’ve done it from the perspective of a PC User.
- Download the MMI 3G Splashscreen Change by Clicking Here
(Thanks to user “S4Per” from www.audizine.com for hosting the script. Please download and use at your own risk, we don’t host it nor did we make it!) - Get yourself a standard SD Card that is no larger than 32GB and pop it into your computer.
- Once loaded right click on the SD Card on your devices / My computer and select Format.
- Change “File System” to FAT32, click “Quick Format” and then Start. Your card is now ready!
- UnZip the file you downloaded in Step 1 and copy the contents on to your freshly formatted card. You need to ensure that all the files are rested on the Root Folder. Basically what this means that when you open the SD Card you should see the files _Screens, _utils etc etc on the top level of the SD Card. Do not house it in a folder or the MMI System won’t read it correctly.
- Once the files are on the SD Card, open it up and go into the folder called “splashscreens”. There should only be 1 file in there. We will be replacing this later.
- Now is the fun part, using your favourite Editing software (I use photoshop) you can work your magic.
- You need to ensure that your newley created “picture” for your MMI follows these simple rules:
- Has the filename startup_generic (Like you saw in Step 6)
- Is PNG Format with 24bit depth
- 800×480 pixels
- Once you’ve got the picture ready, go back to Step 6 and paste the file into that folder. As it’s the same file name it will ask you if you want to overwrite, just say yes!
- Head out to your car, fire up the MMI system and remove all SD Cards.
- Once the MMI has been running for at least 3 minutes pop the SD Card you have been working on into SD 1.
- All going well you should see your original splash screen with a box popup with German text. Roughly translated it says: “Turn MMI Knob to return to Home Screen”. So you need to do just that.
- Once you’re back on the main screen you need to do an MMI reset. This varies from car to car so search on YouTube. On this A6 it’s Menu Button, Big Knob and Top Right. Push it all at once and voila.
- Upon reset your new MMI Screen should pop up on the screen and you can bask in your glory!! Now if you don’t see the new screen then you need to keep working your way down the list. Get back to work slacker!!
- So if you’ve got to this step we need to go into the MMI fabled “Green Screen”. You will need VCDS and if you or a friend has access to it then you need to do the following. This isn’t a VCDS tutorial so I’ll assume you know how to do the below to activate it:
- Select control module 5F in VAG-COM/VCDS
- Select “Adaptation – 10”
- Select channel 6
- Set the value to 1
- Press test
- Press save
- Press “Done, Go Back”, close the controller and quit the software
- Once you’ve done the above simply hit Menu & Car together very quickly and you’ll be presented with a very green / black screen!
- Right you’re in the Green Screen and you need to follow the below VERY CAREFULLY:
- Go to Car
- Go to CarCodingVehicle
- Select No of screen and set to 0.
- Once that’s done, smash out another MMI reset and you’re golden and you should be presented with your lovely new MMI Splash Screen
If you found all of that hard work then you can watch the video below, make sure to smash out a few likes on the video to show your love and appreciation!
Thank you and Good Night, you’ve been wonderful!
PS – Let us know how you get on in the comments below.


![IMG_7830 copy[89] IMG_7830 copy[89]](https://www.advanced-incar.co.uk/wp-content/uploads/2024/12/IMG_7830-copy89-scaled-600x462.jpg)