Welcome to our first ever Retrofit Case Study!
It’s a fresh new idea for our blog to show you “how we do what we do” and the attention to detail we offer whilst working on all of our fantastic customer vehicles. We really wanted to give you a behind the scenes access so that you know whilst your vehicle is under our care it will be given the attention it deserves. Also we hope, it will give you the confidence to use us as your preferred retrofit company.
When we speak to people over the phone or via email we try and convey the message that we’re not the cheapest company out there and would never want to be, but we are top of our game. The majority of the vehicles we work on are very expensive and need to be treated with the correct level of care and attention to detail. It’s not about how cheap you can get it but how well you can get your vehicle taken apart, the right type of equipment installed and then reassembled properly again!
First up we’re working on a 2017 Facelift Audi S3 that has travelled down from Surrey to get the Full AICT Treatment. We’re going to be Retrofitting the Genuine Audi S3 Highline Reversing Camera that features moving guidelines and Genuine Audi Front OPS (Optical Parking Sensors). It’s a serious upgrade that will transform how easy it is to park the car.
Let’s dive straight in:
Before any vehicle enters the workshop, we’ll do a walk-round the vehicle with the customer to make sure we know about any prior damage, marks or concerns!
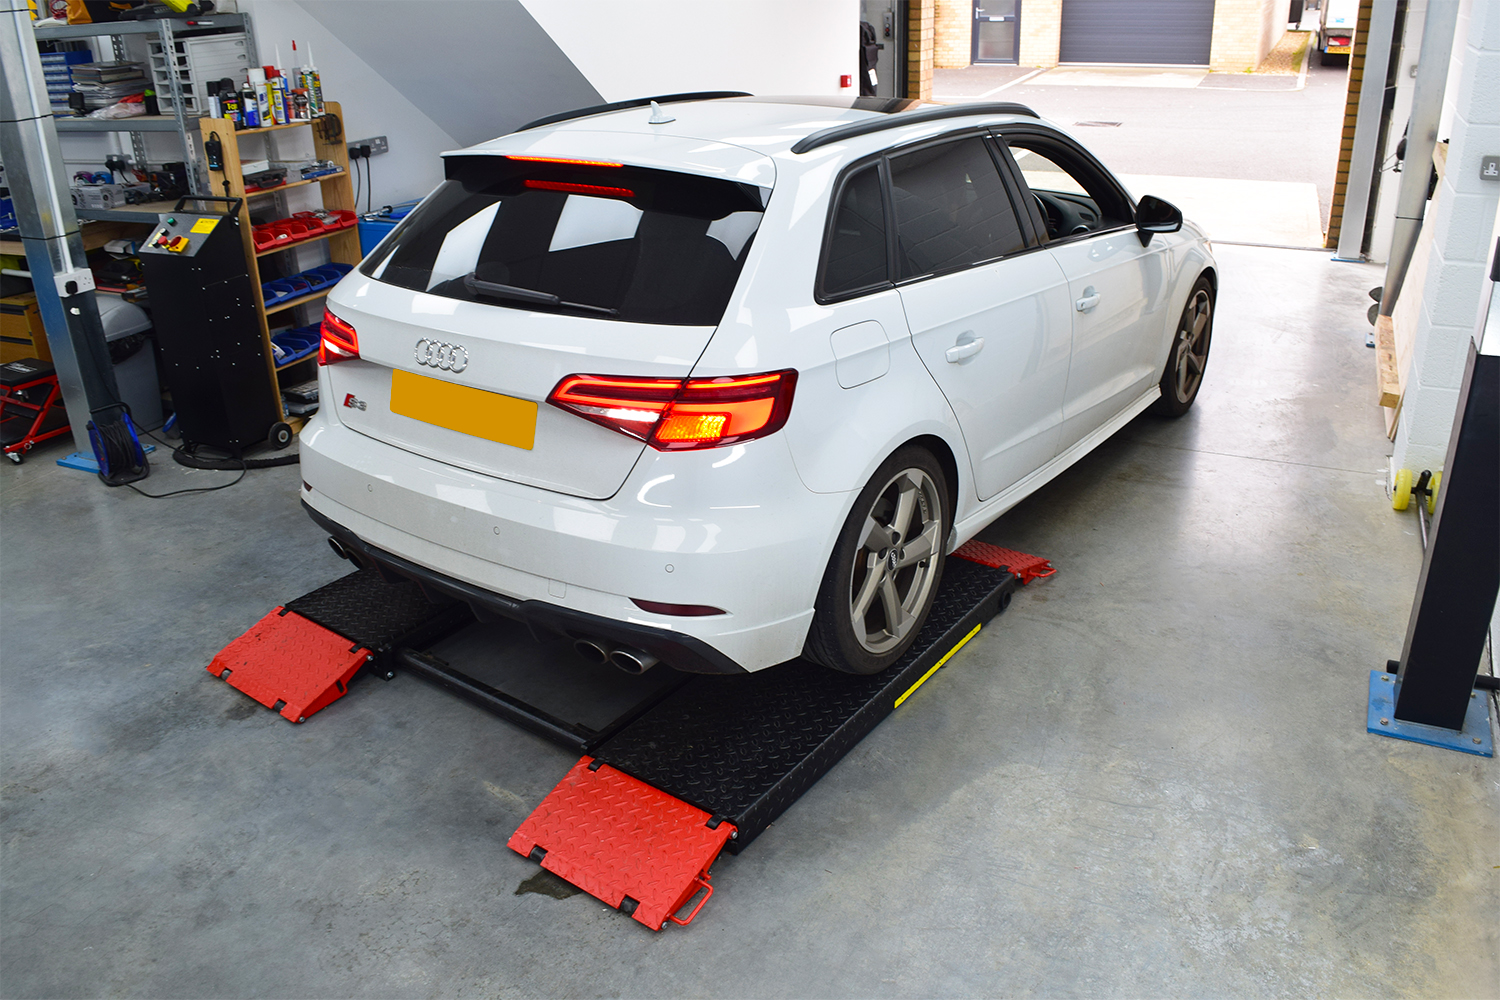
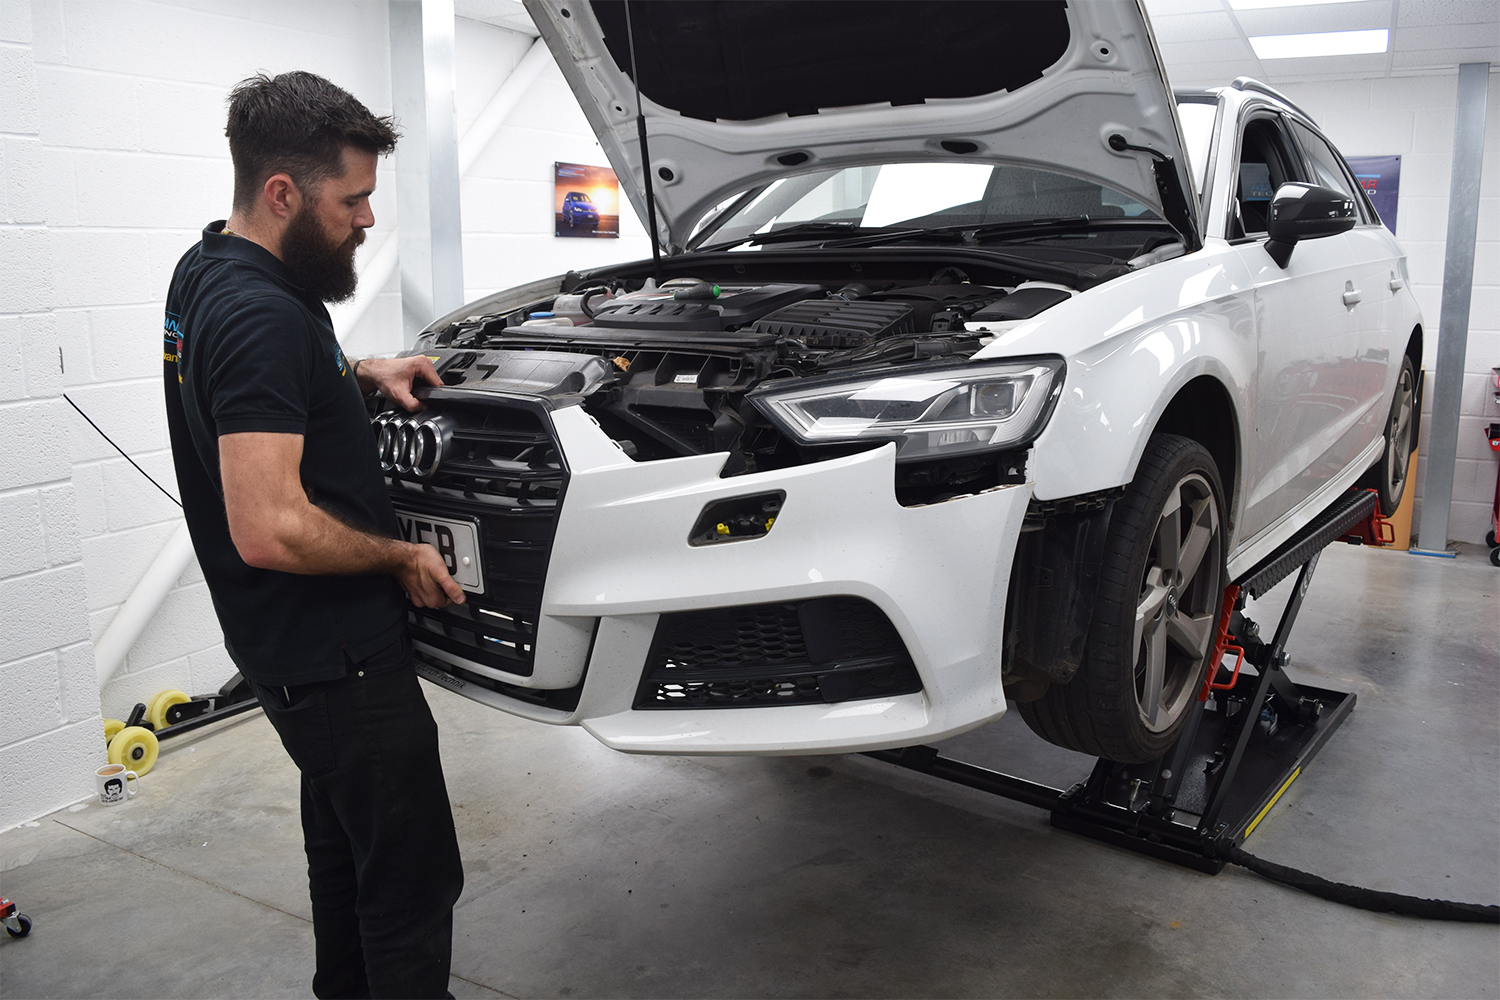
In our workshop we have a brilliant new Snap-On Scissor lift that allows us to lift the car to the perfect working height. Not only is it good for the safety of our engineers and the cars it means we can see exactly what we need to be doing when we need to do it.
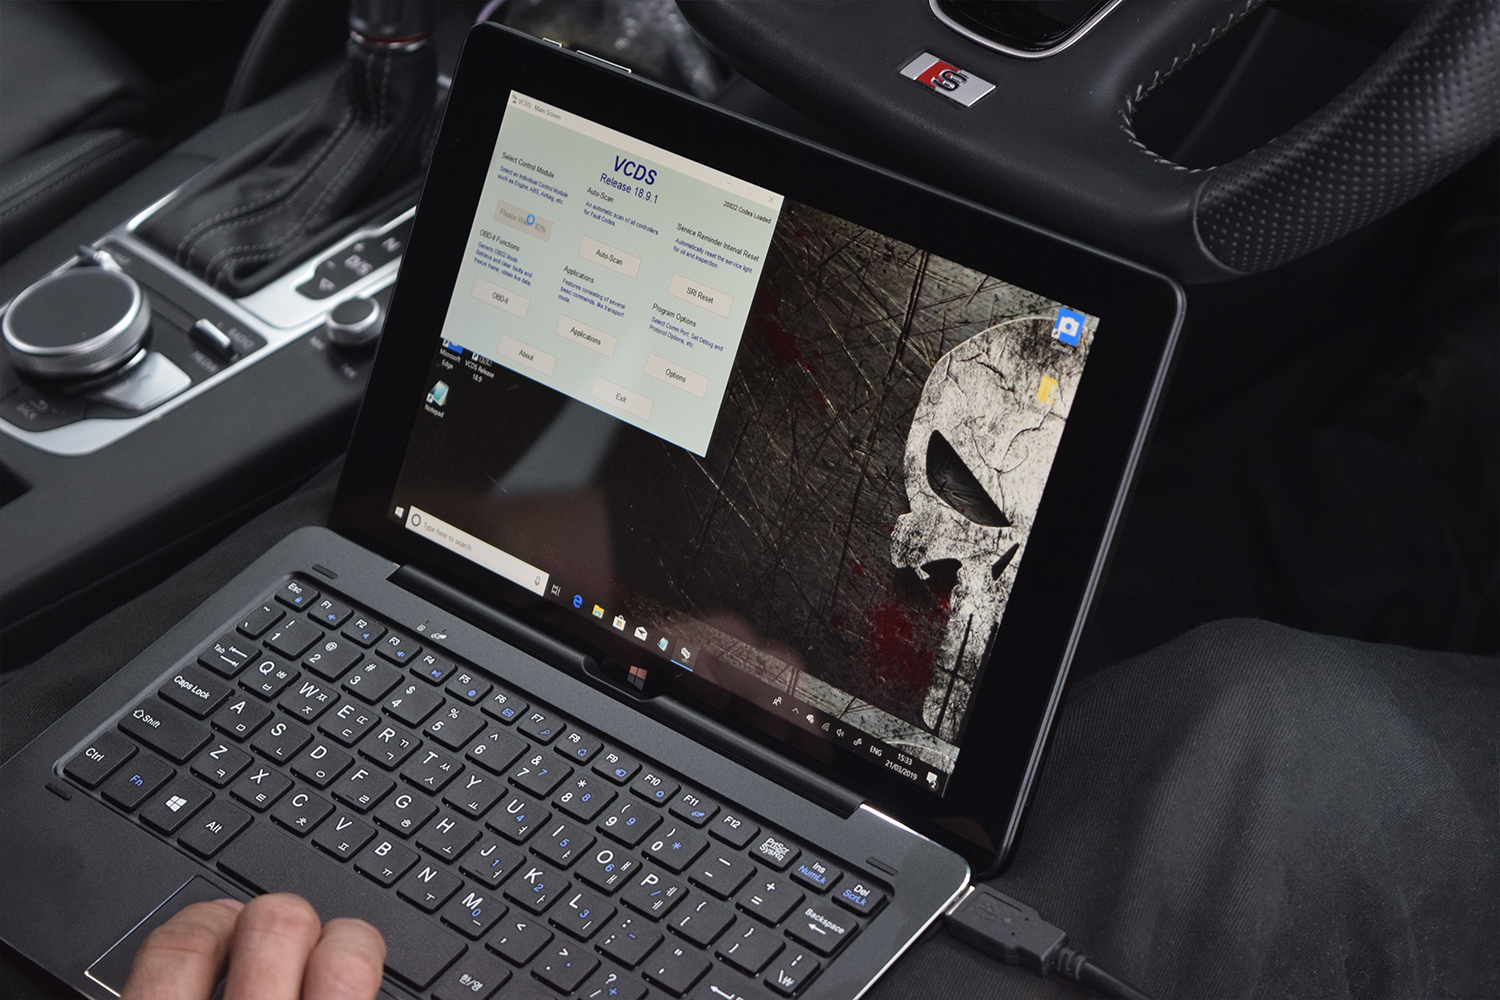
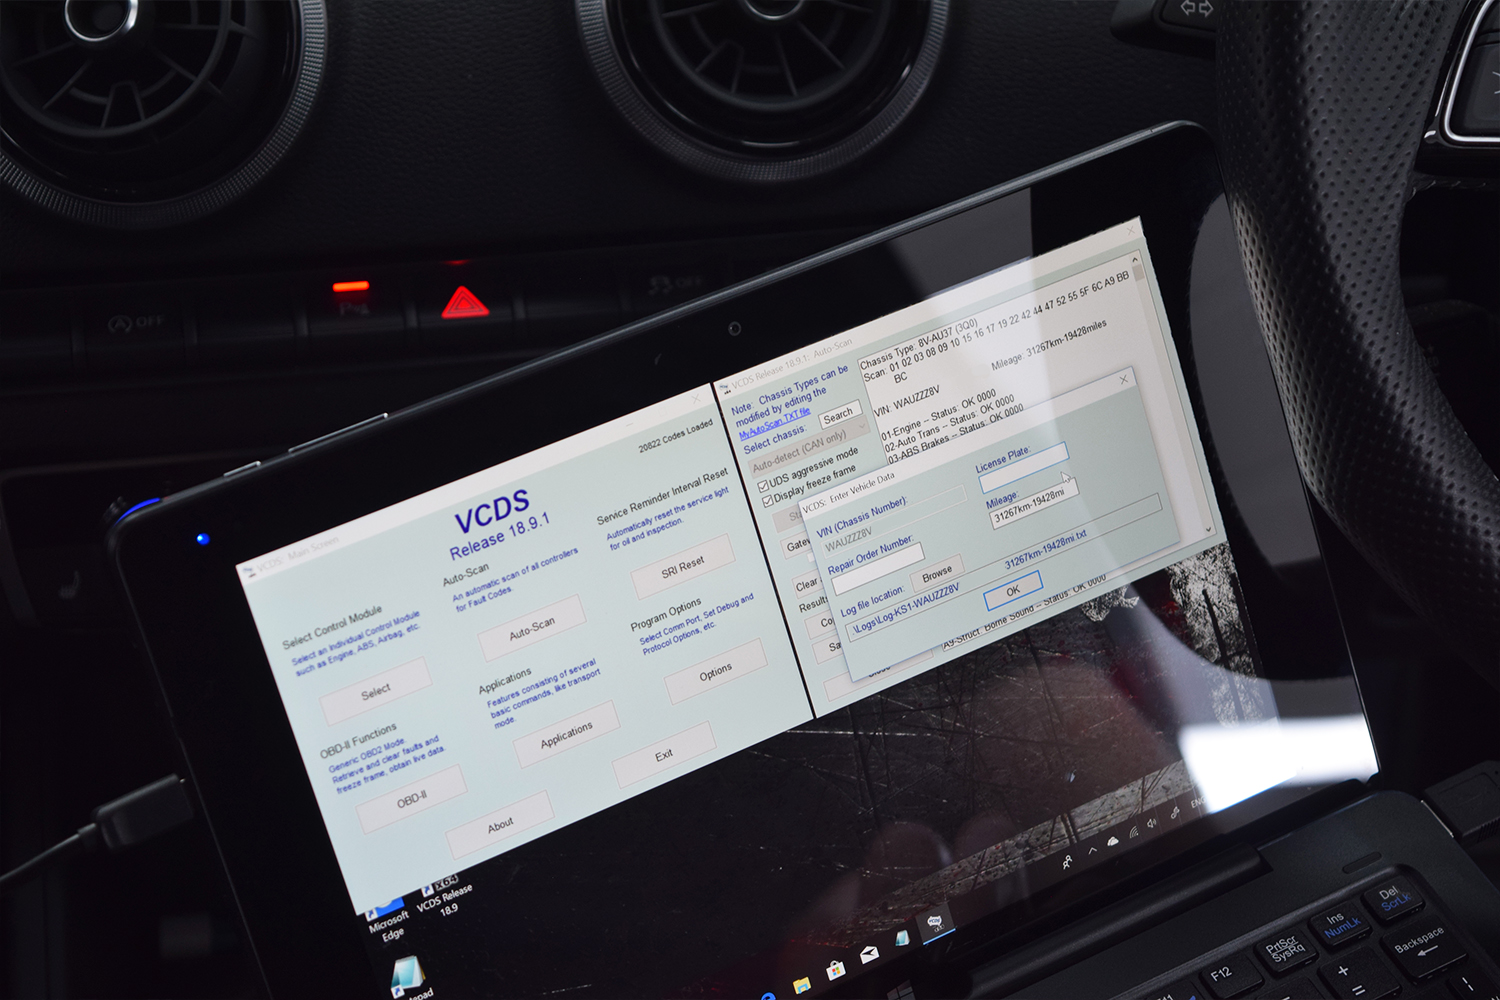
Once the vehicle has entered the workshop, we’ll perform a scan on the vehicle of the on-board computers and modules to ensure we have a bench-mark as well as checking the health of the vehicle. If any problems arise later on down the line or after the car has left us we can show how the car came into the workshop.
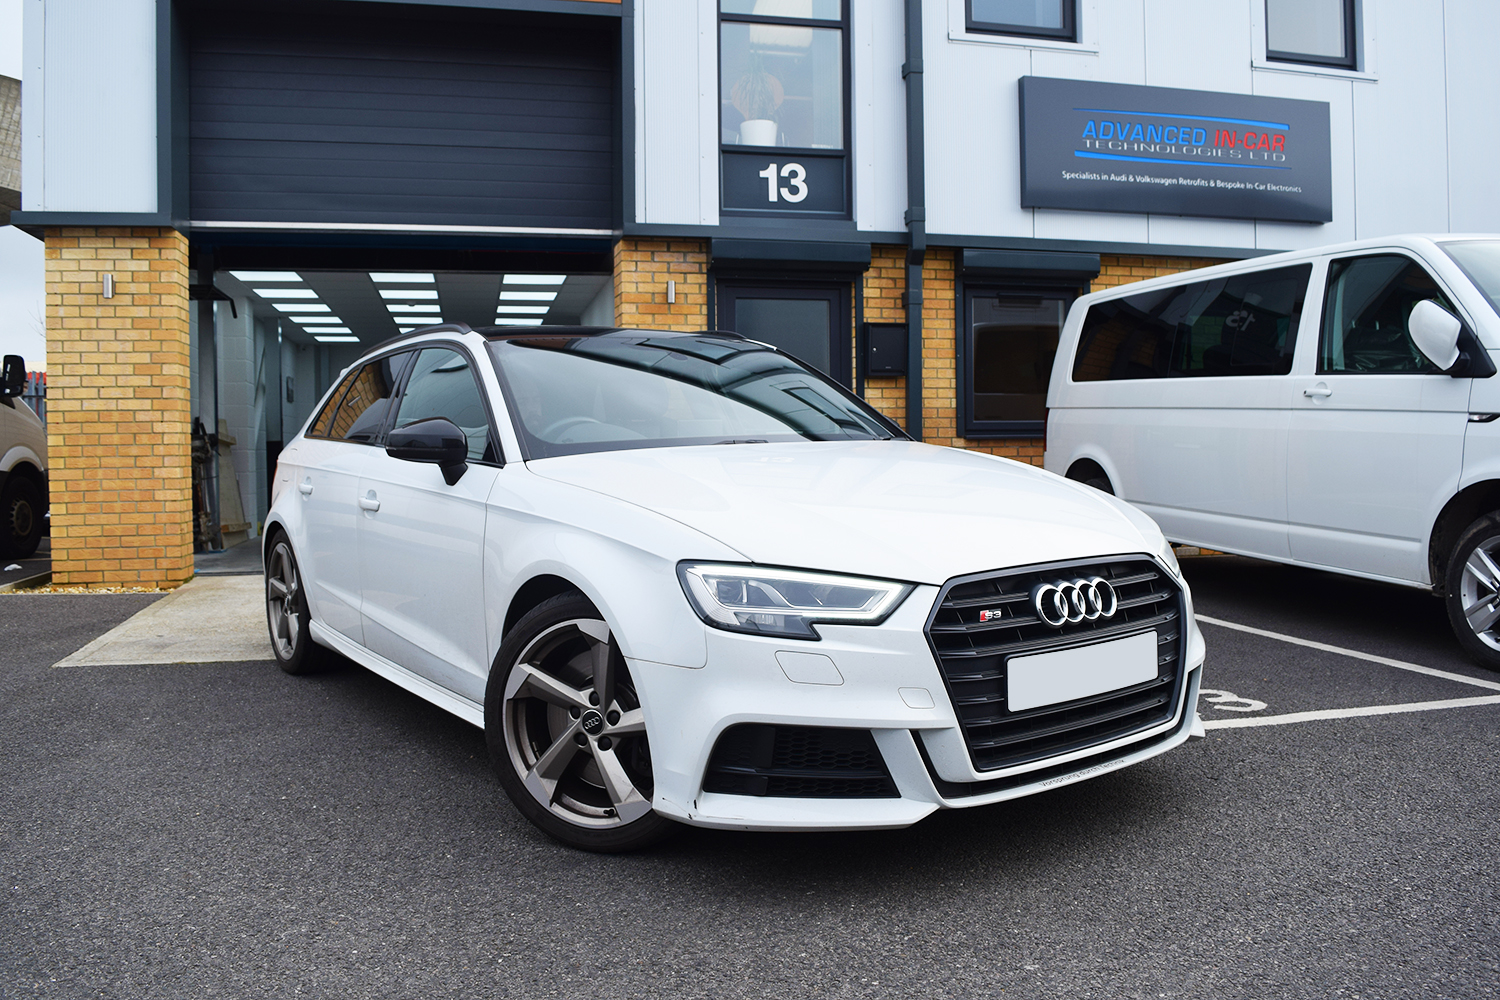
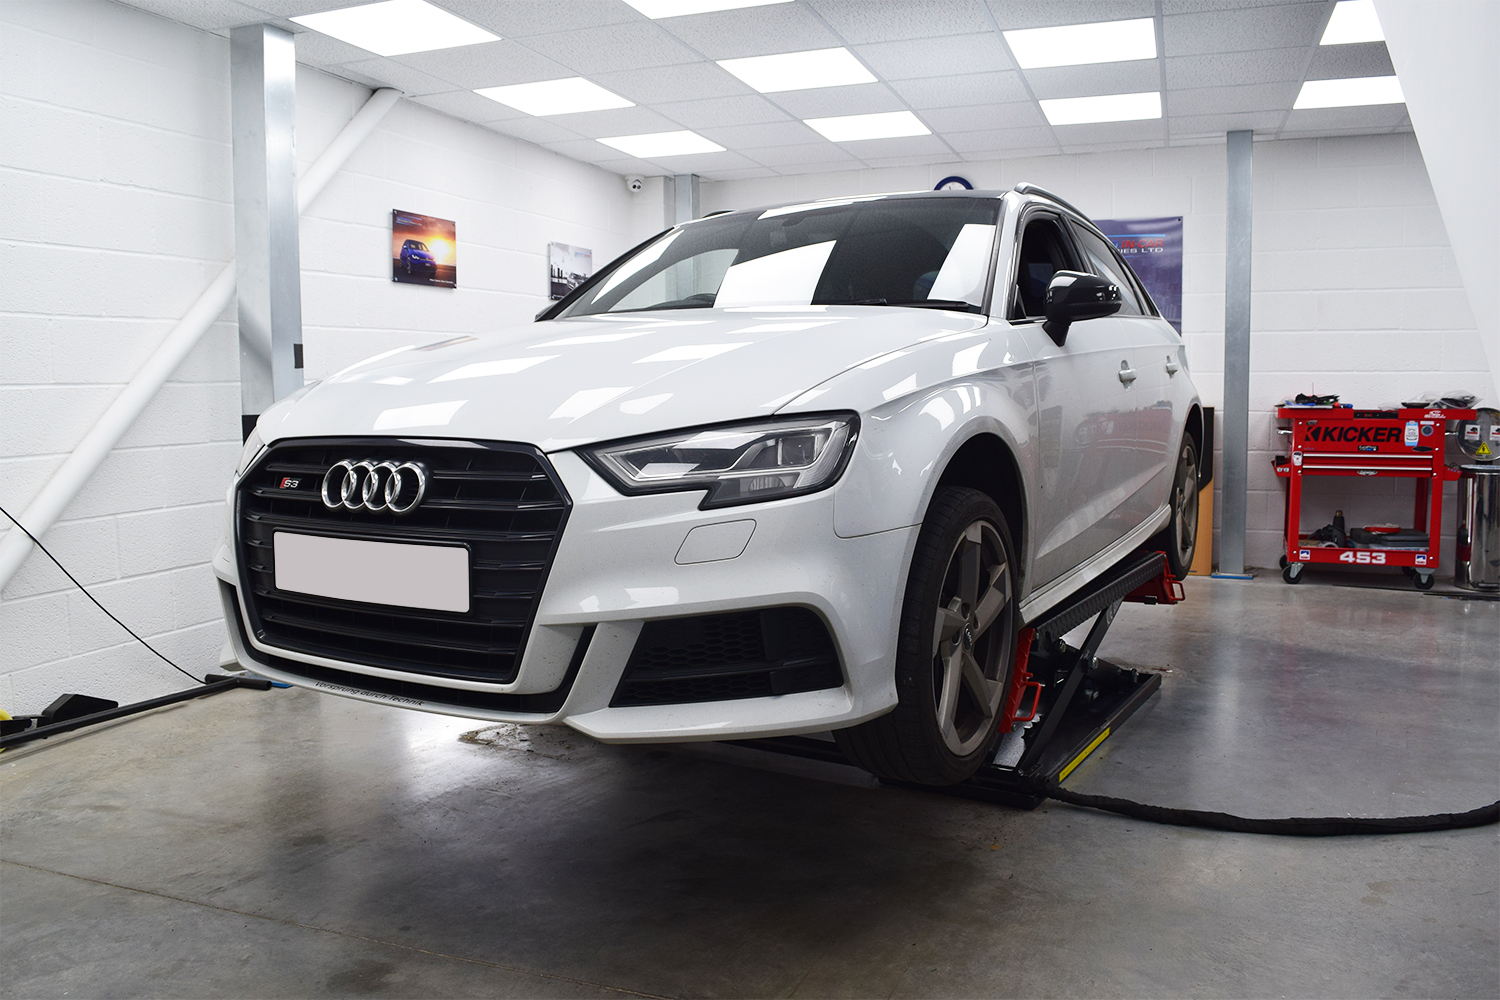
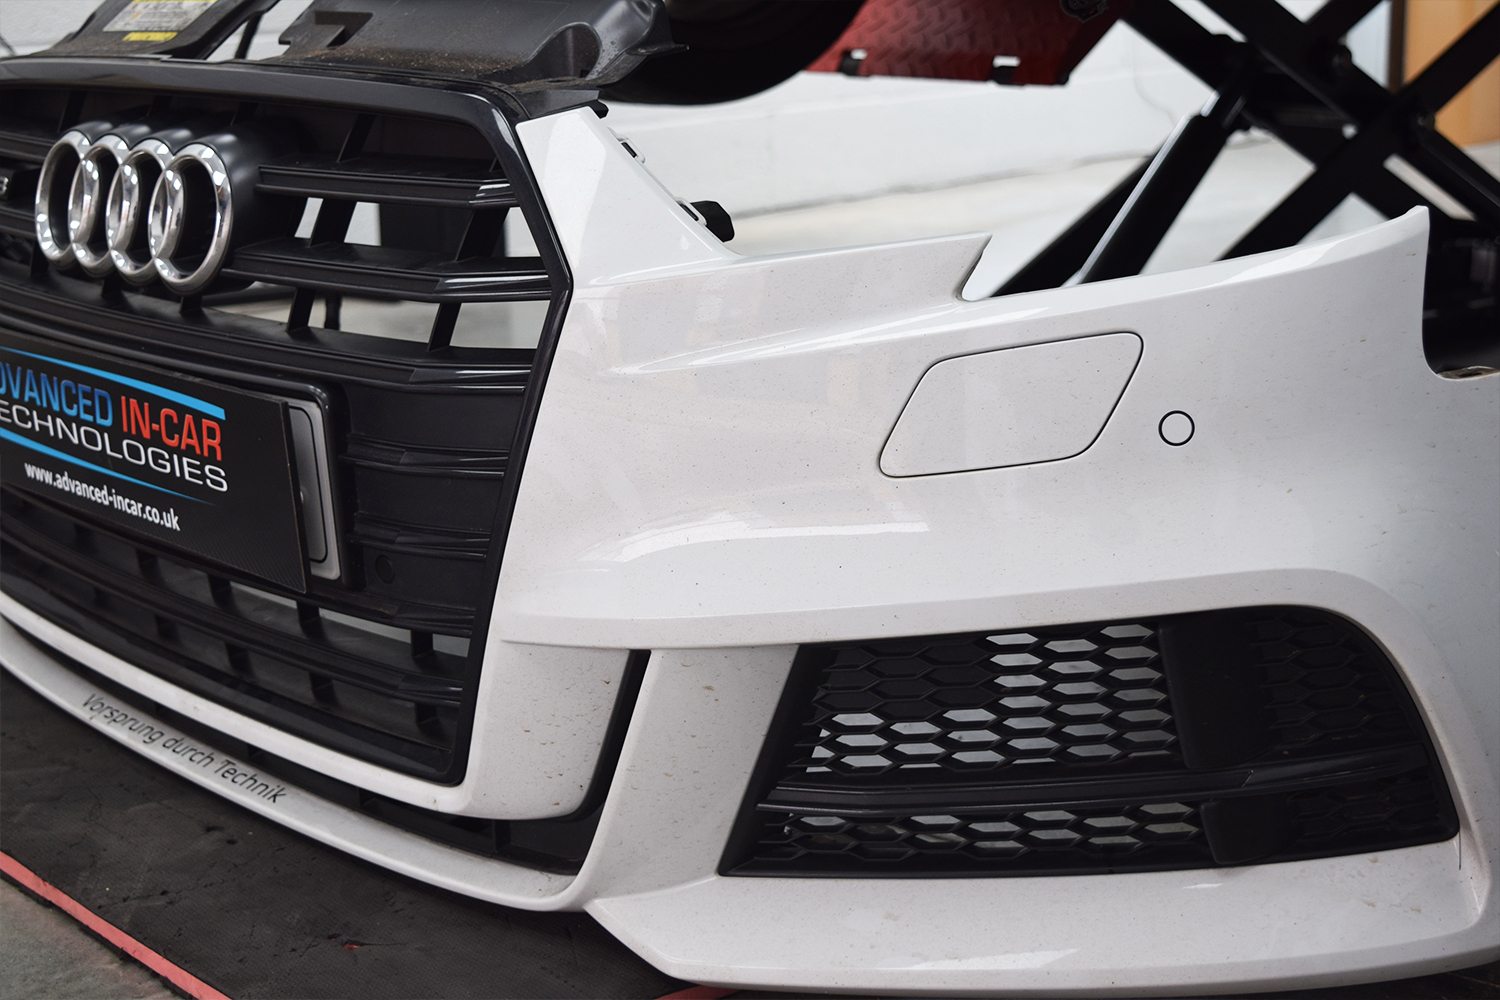
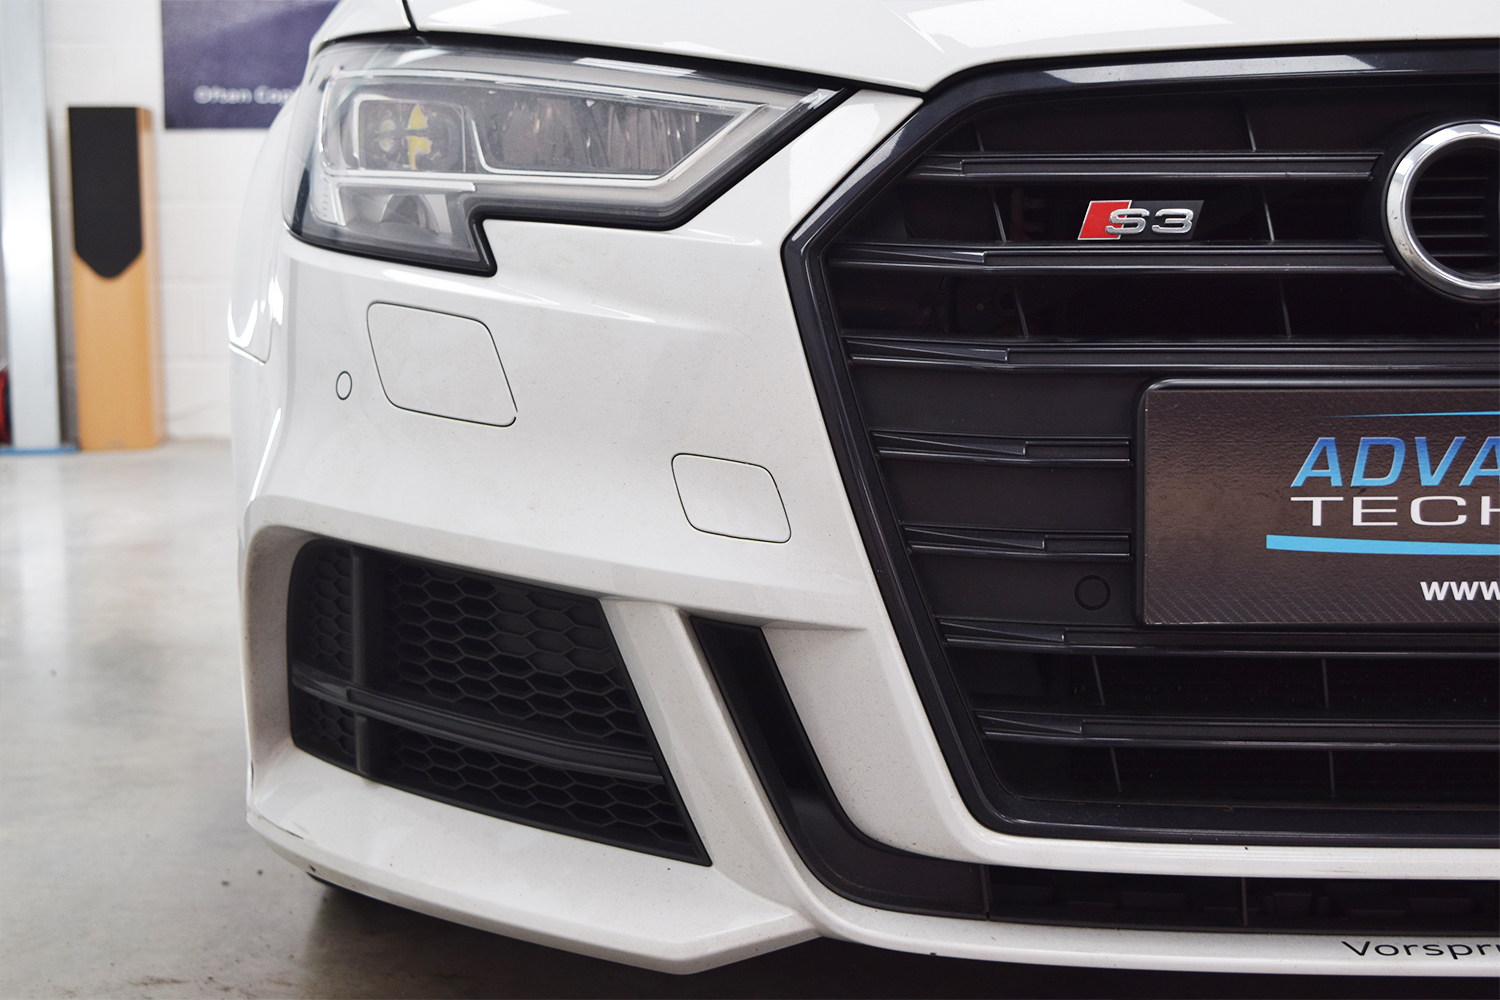
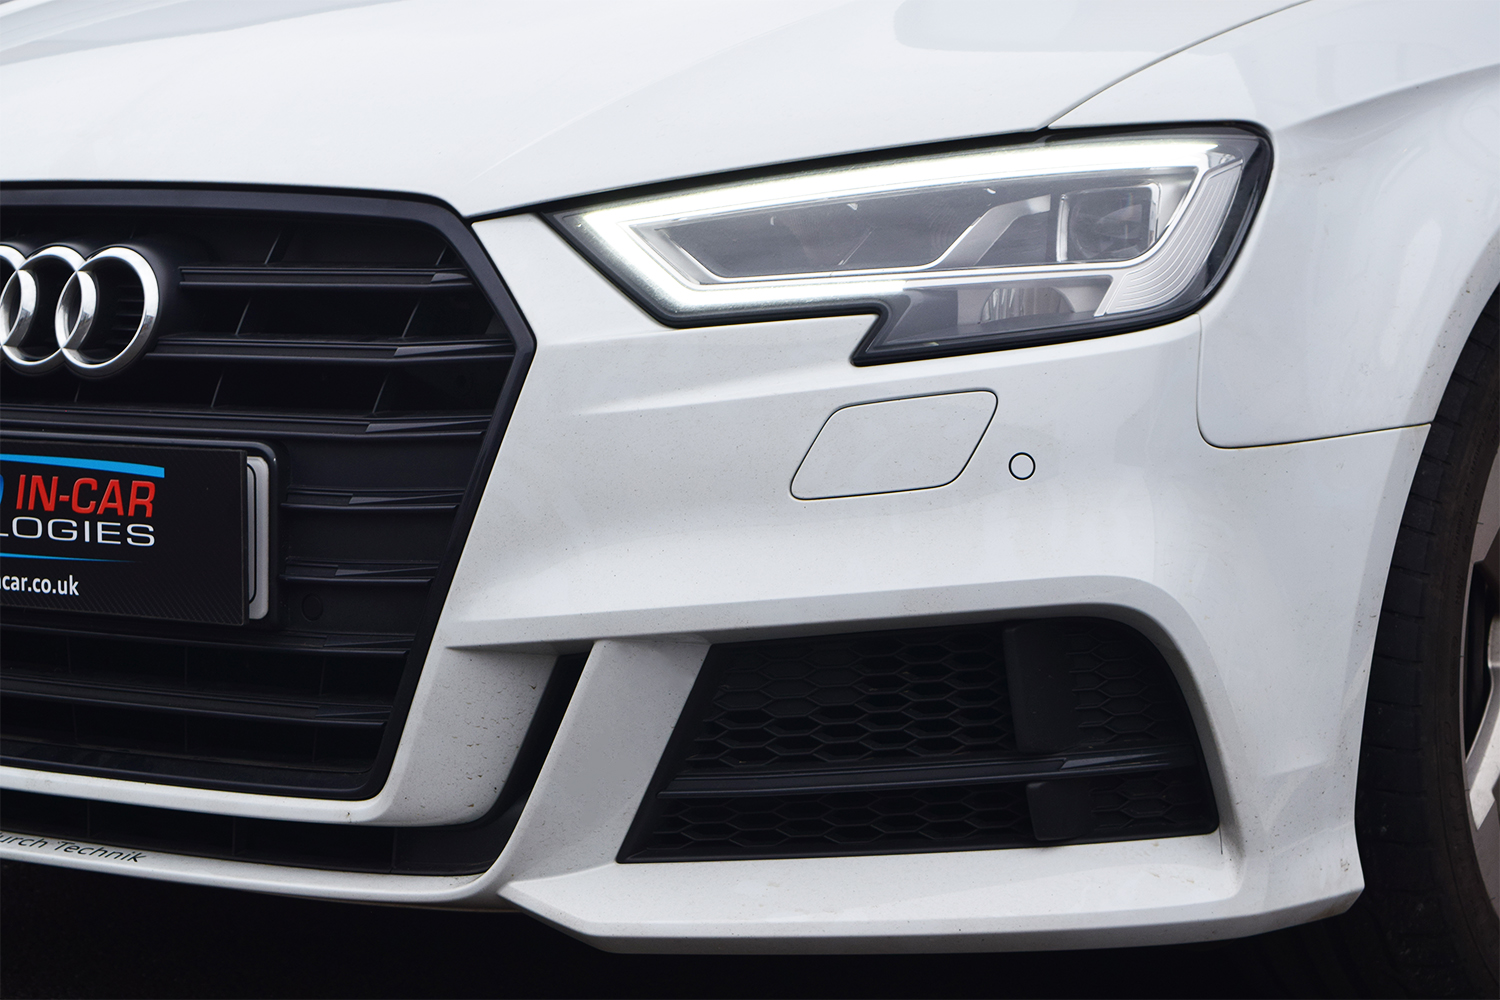
In the picture below you can see this great car sadly lacking front parking sensors, soon to change!
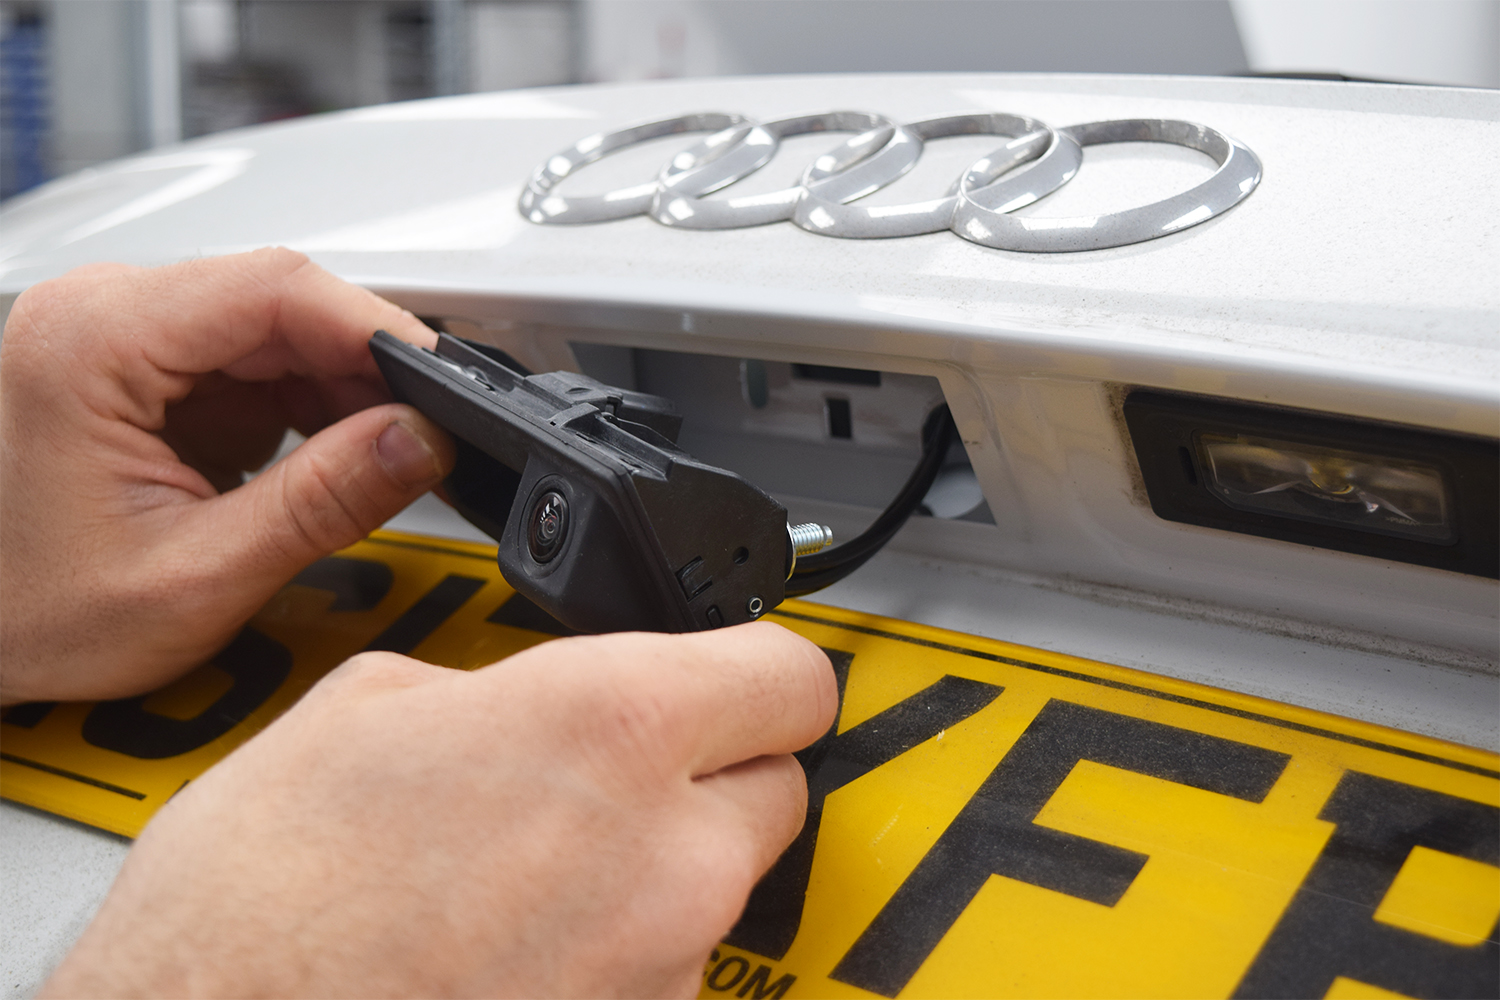
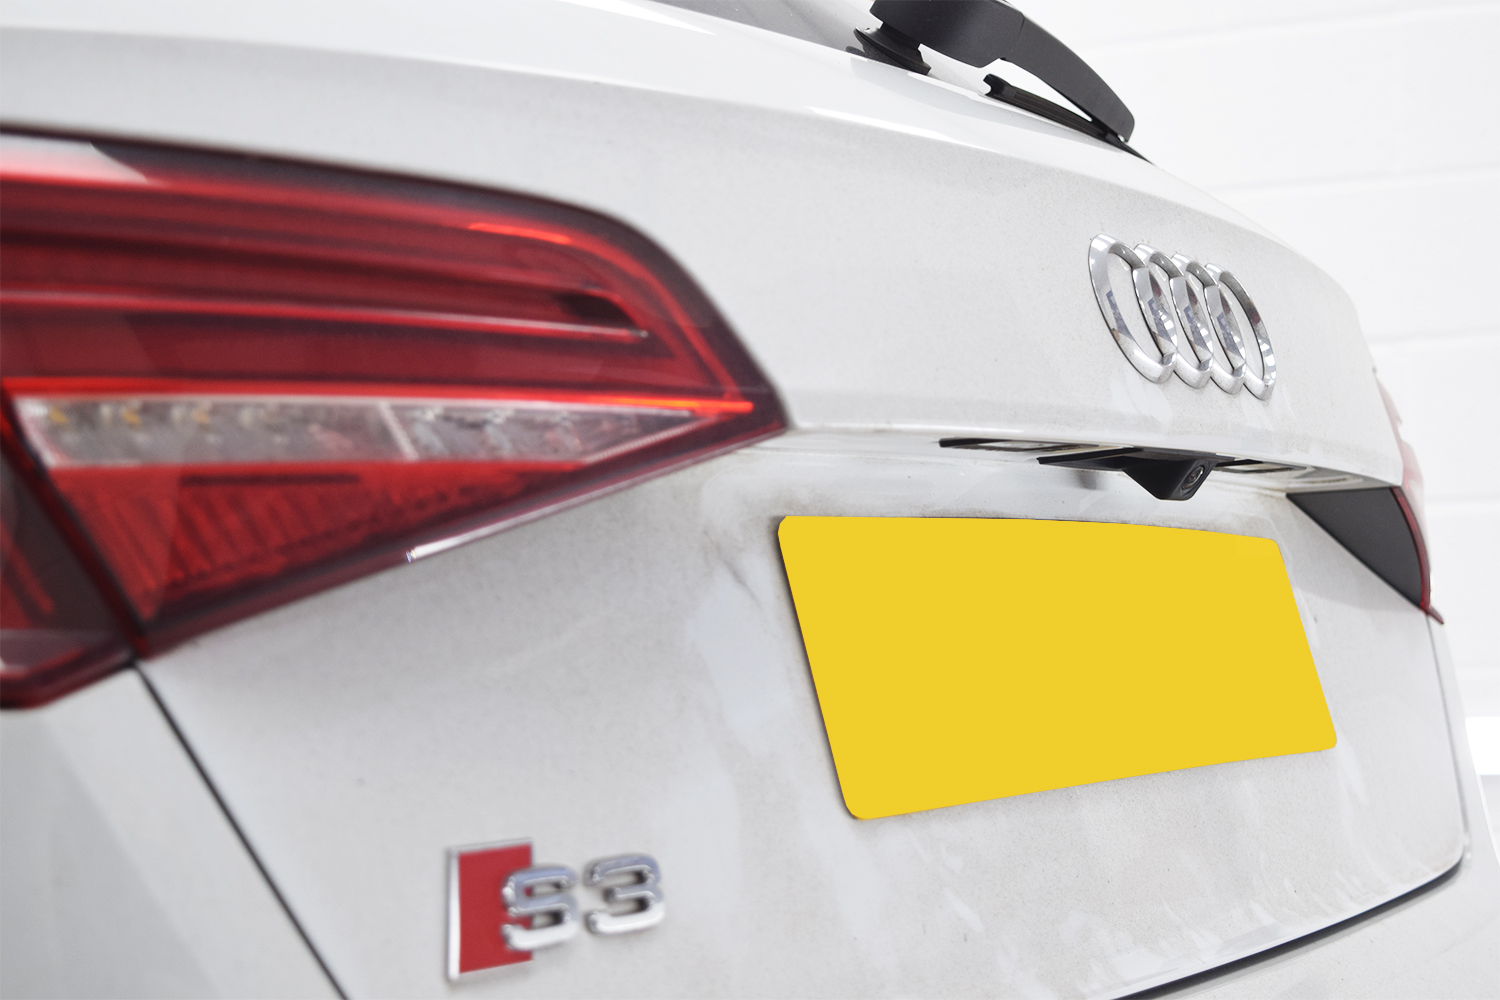
Here we can see Rich has taken apart the rear tailgate which allows access to the grab handle that needs to be removed in order for the new factory camera / grab handle to be installed.
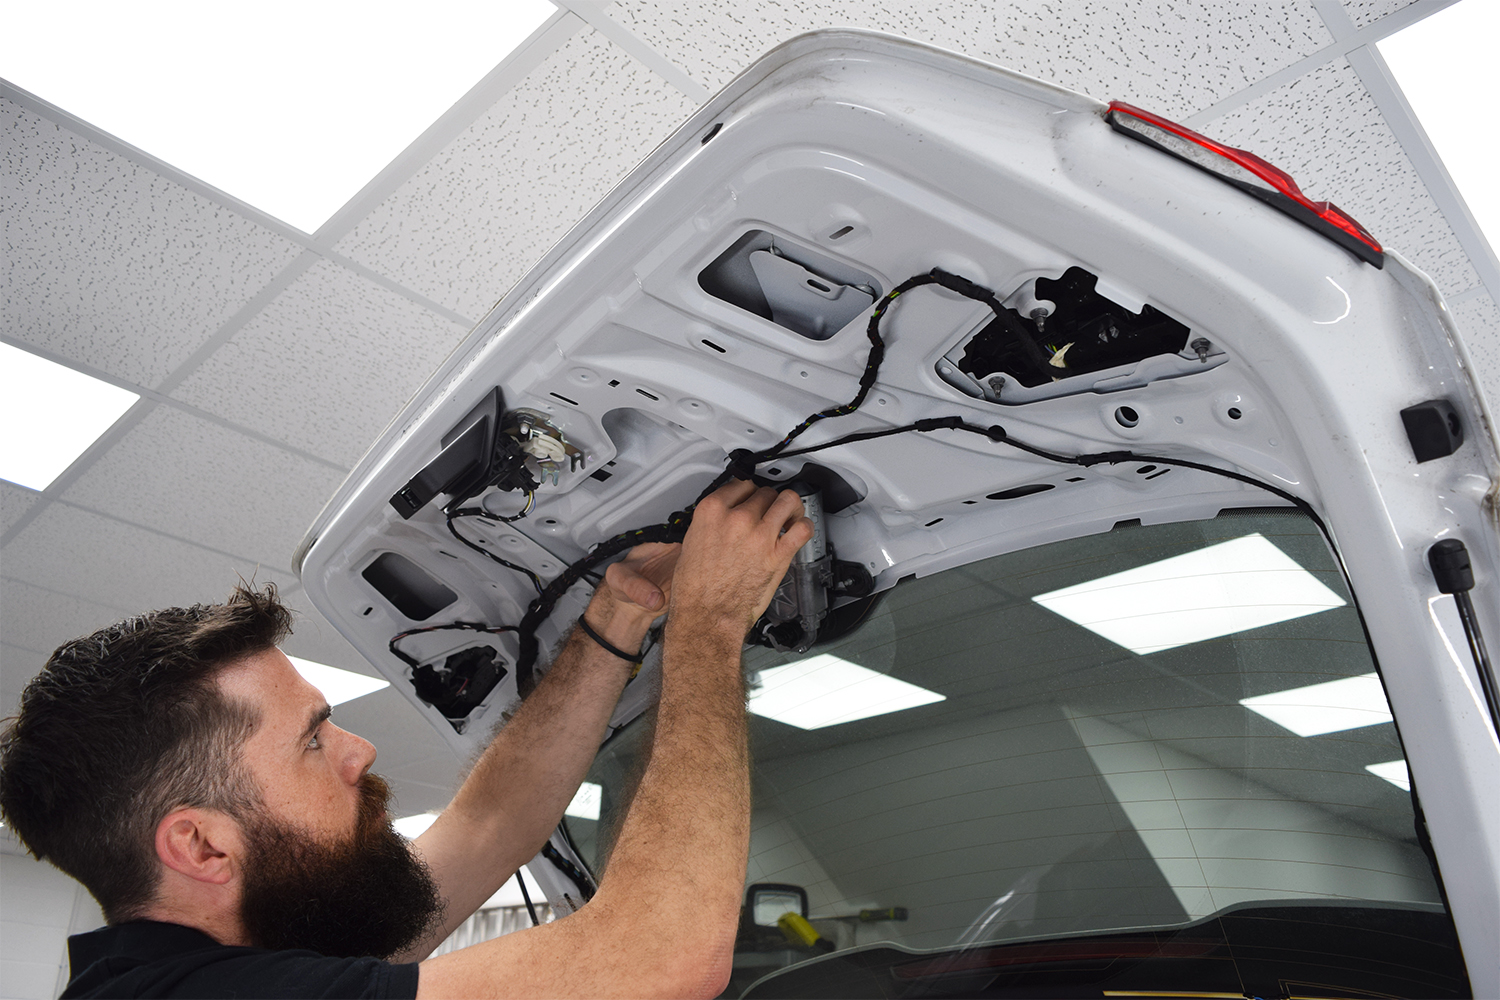
The new camera which actually forms part of the handle is a Genuine Audi part that is designed to fit perfectly into the existing hole and secures in place from behind.
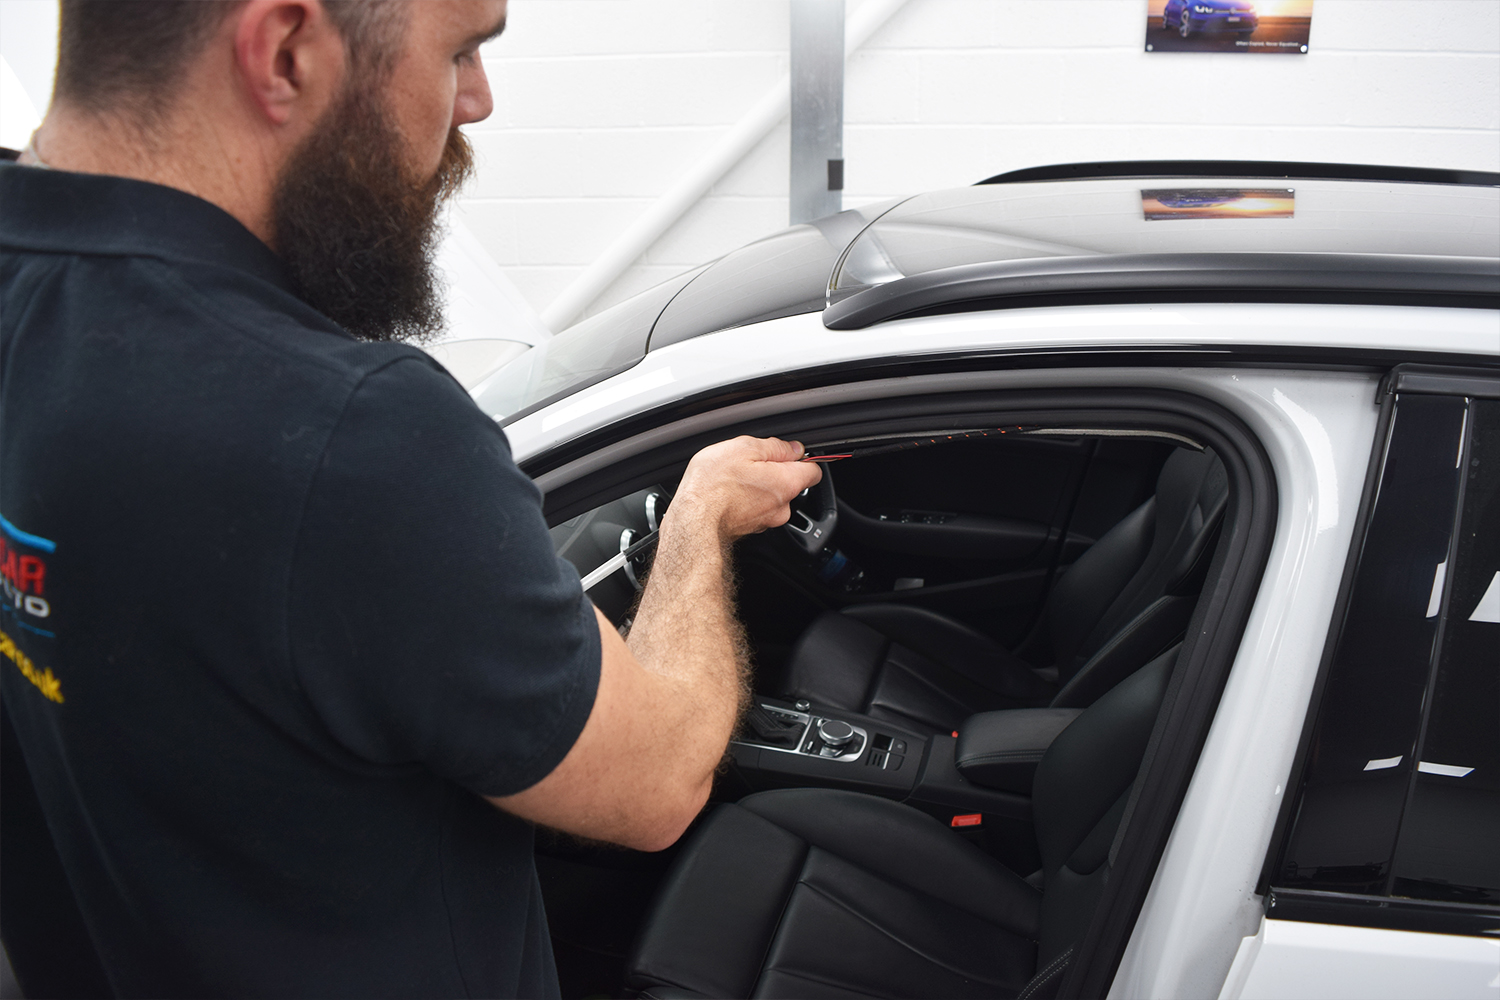
Once the camera is installed the wiring has to make its way through the tailgate and down through the grommet whilst being secured along the way. Once we’ve got the wiring to the main body of the vehicle it gets fed down the length of the vehicle to the front of the vehicle. It pops out and is secured just in front of the B-Pillar.
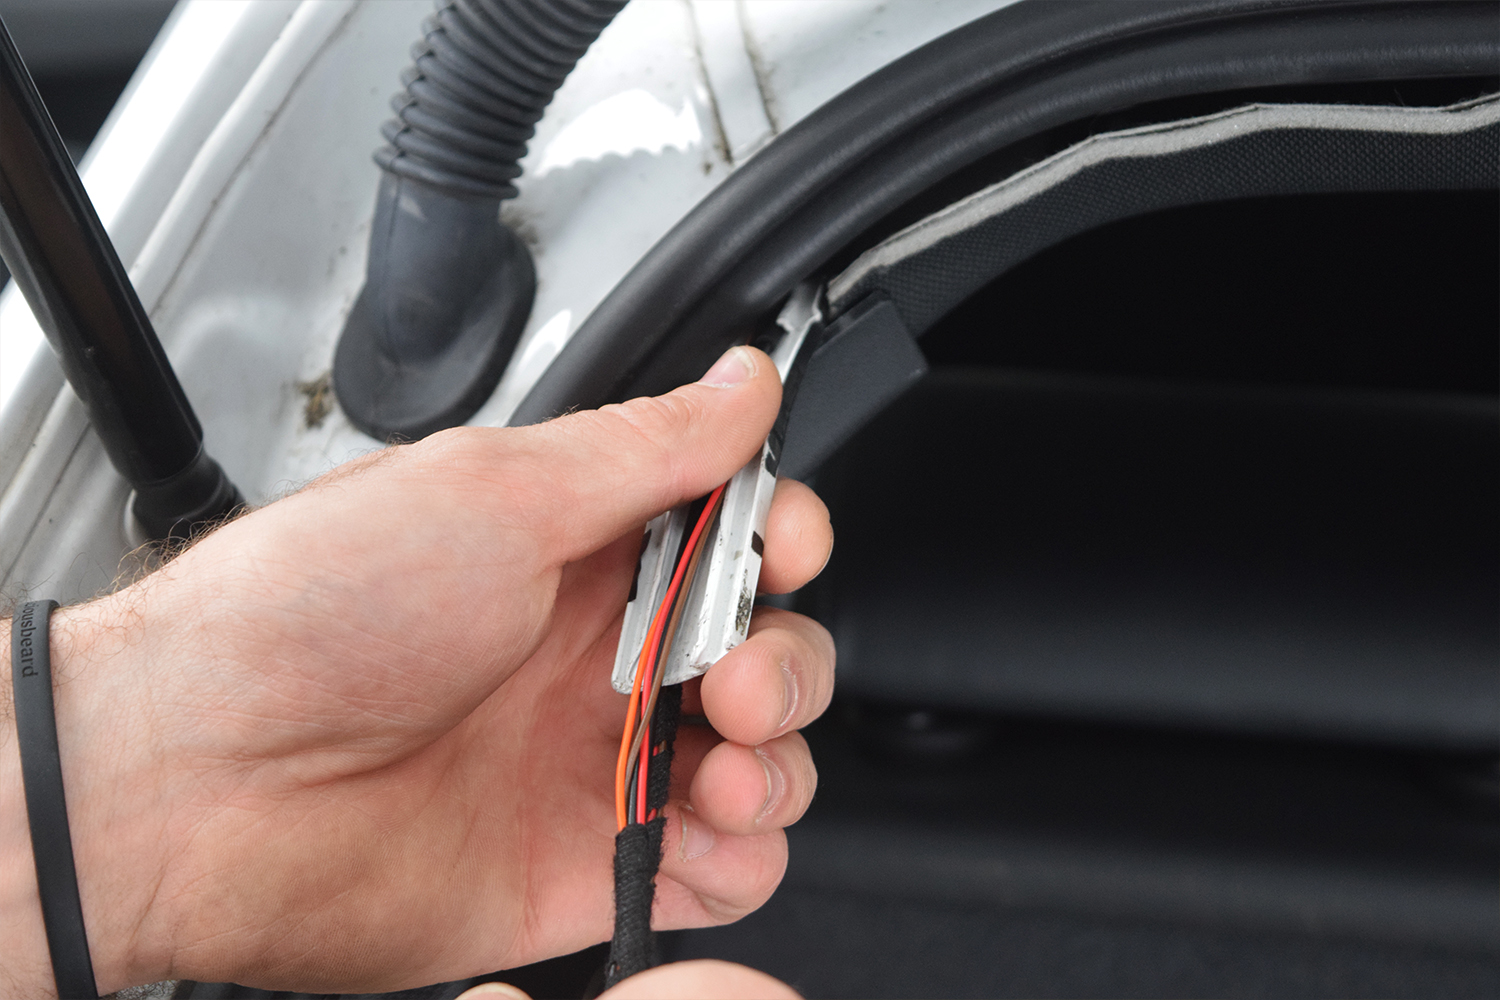
As you can see from the image below the wiring has now made its way to the front of the vehicle. It’s important to note that this wiring is routed along the roof lining along with the factory loom to prevent any vibrations or rattles whilst in motion. One of the reasons we do it this way is so that we don’t have to drop the headlining and cause any un-necessary creases in the lining.
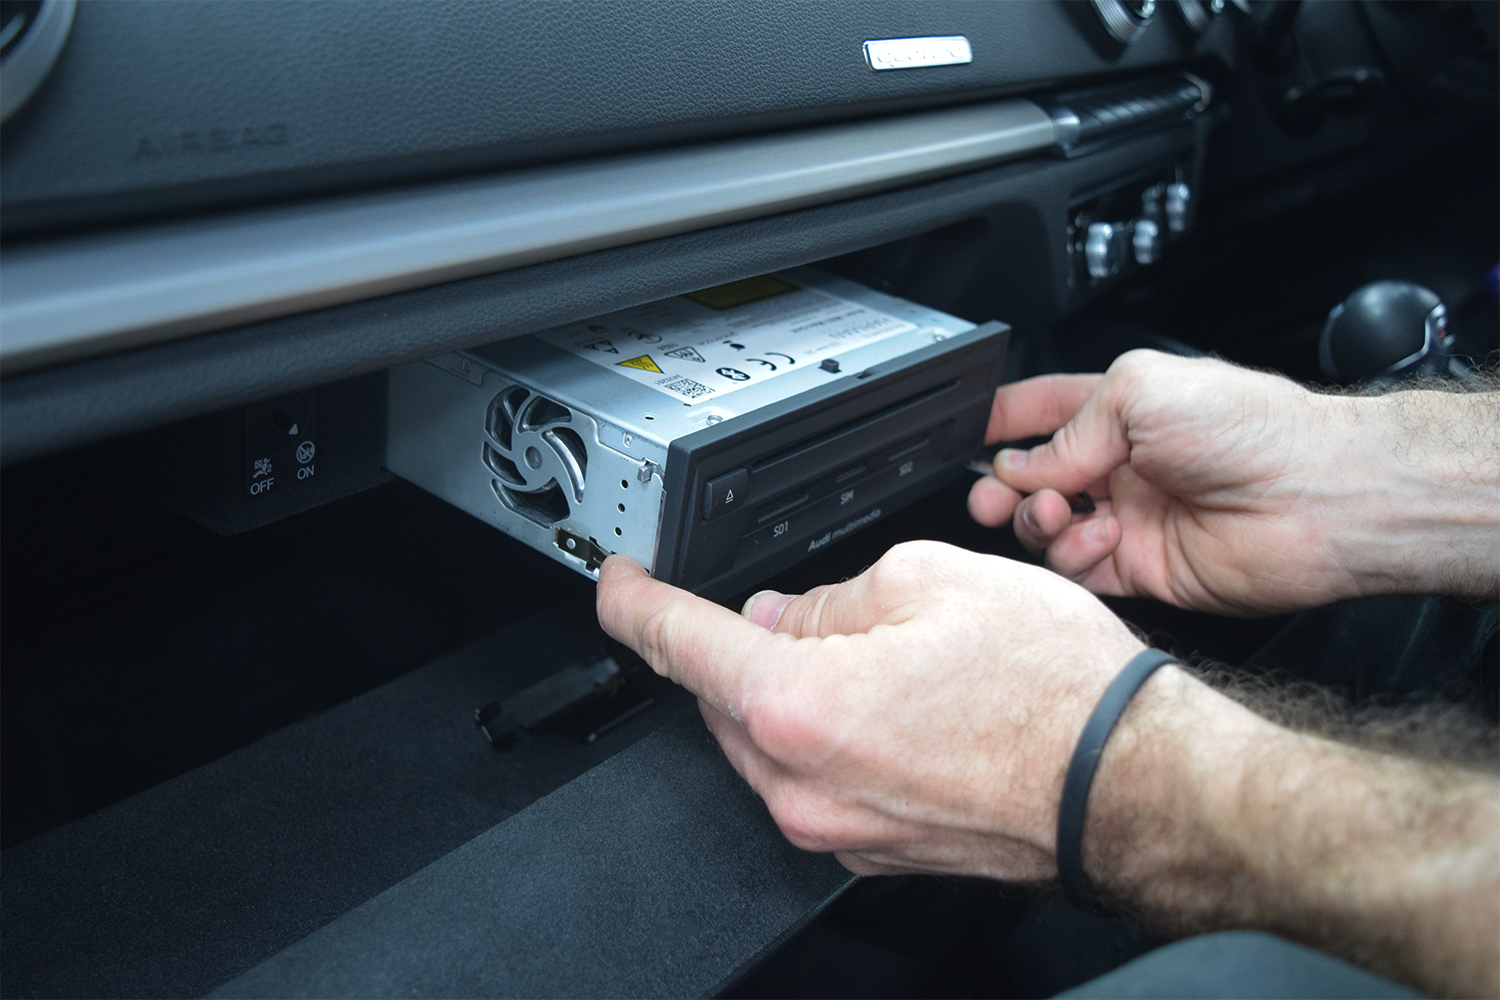
When the wiring has all been secured behind the scenes and made its way up to the glove box we have to remove the MMI Unit (Also known as the 5F Infotainment Unit).
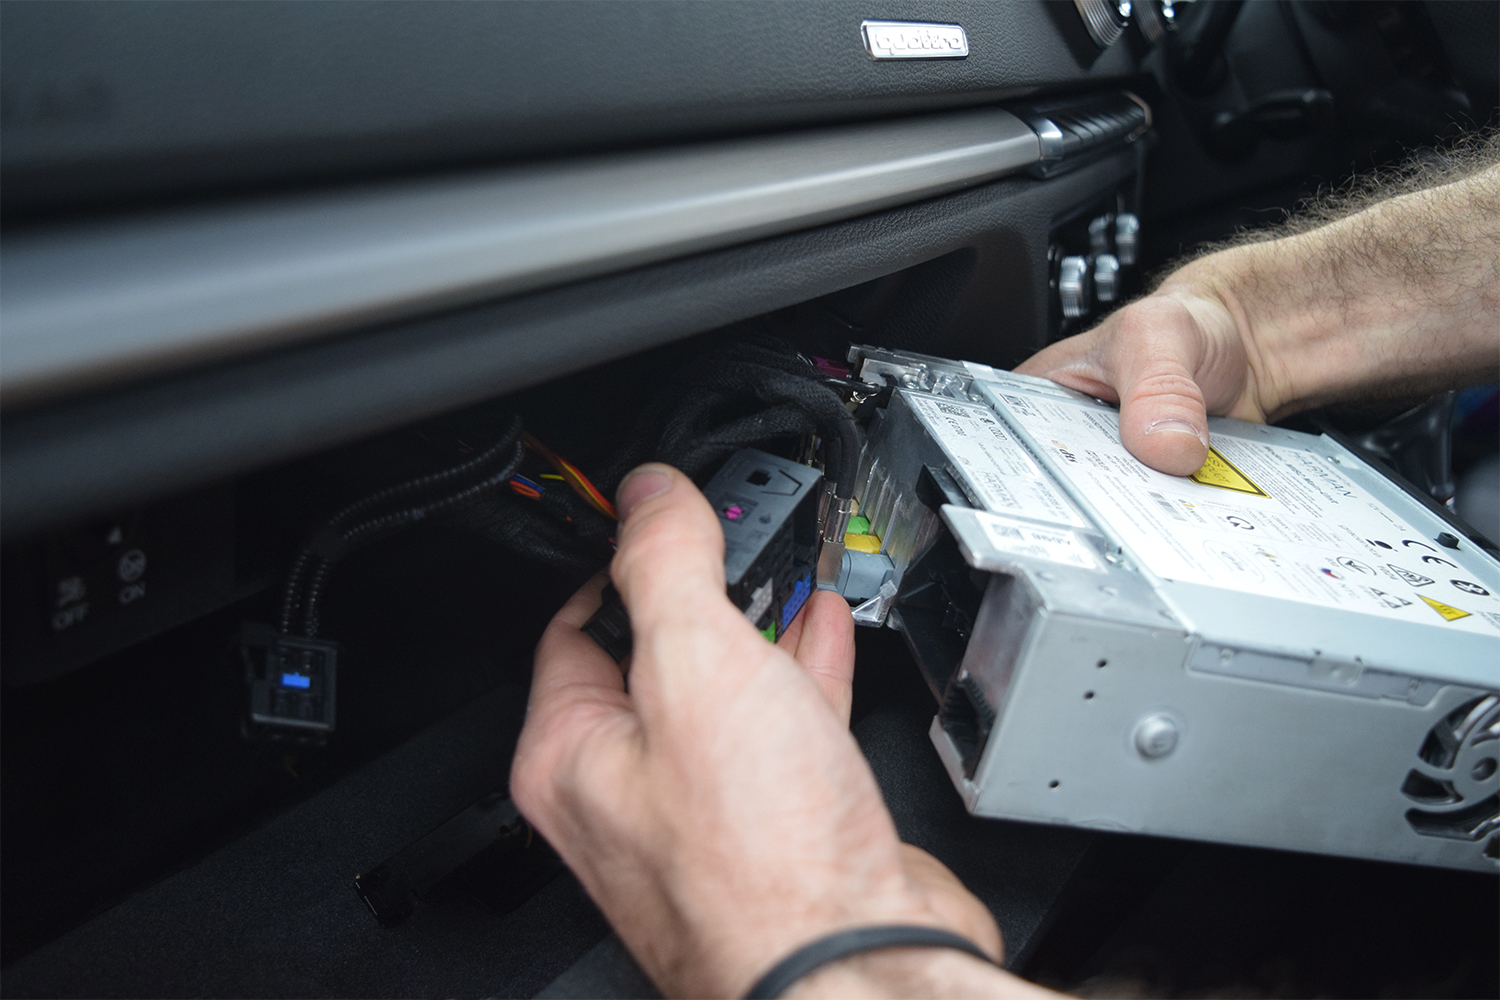
Once the MMI Unit has been fully disconnected the wiring for the Reverse camera gets integrated into the main wiring harness and locked in place keeping that all-important OE look.
As soon as the wiring has been completed and the MMI Unit secured in place, the physical aspect of the camera install has been completed. We’ll come back to the camera later when we get to coding!
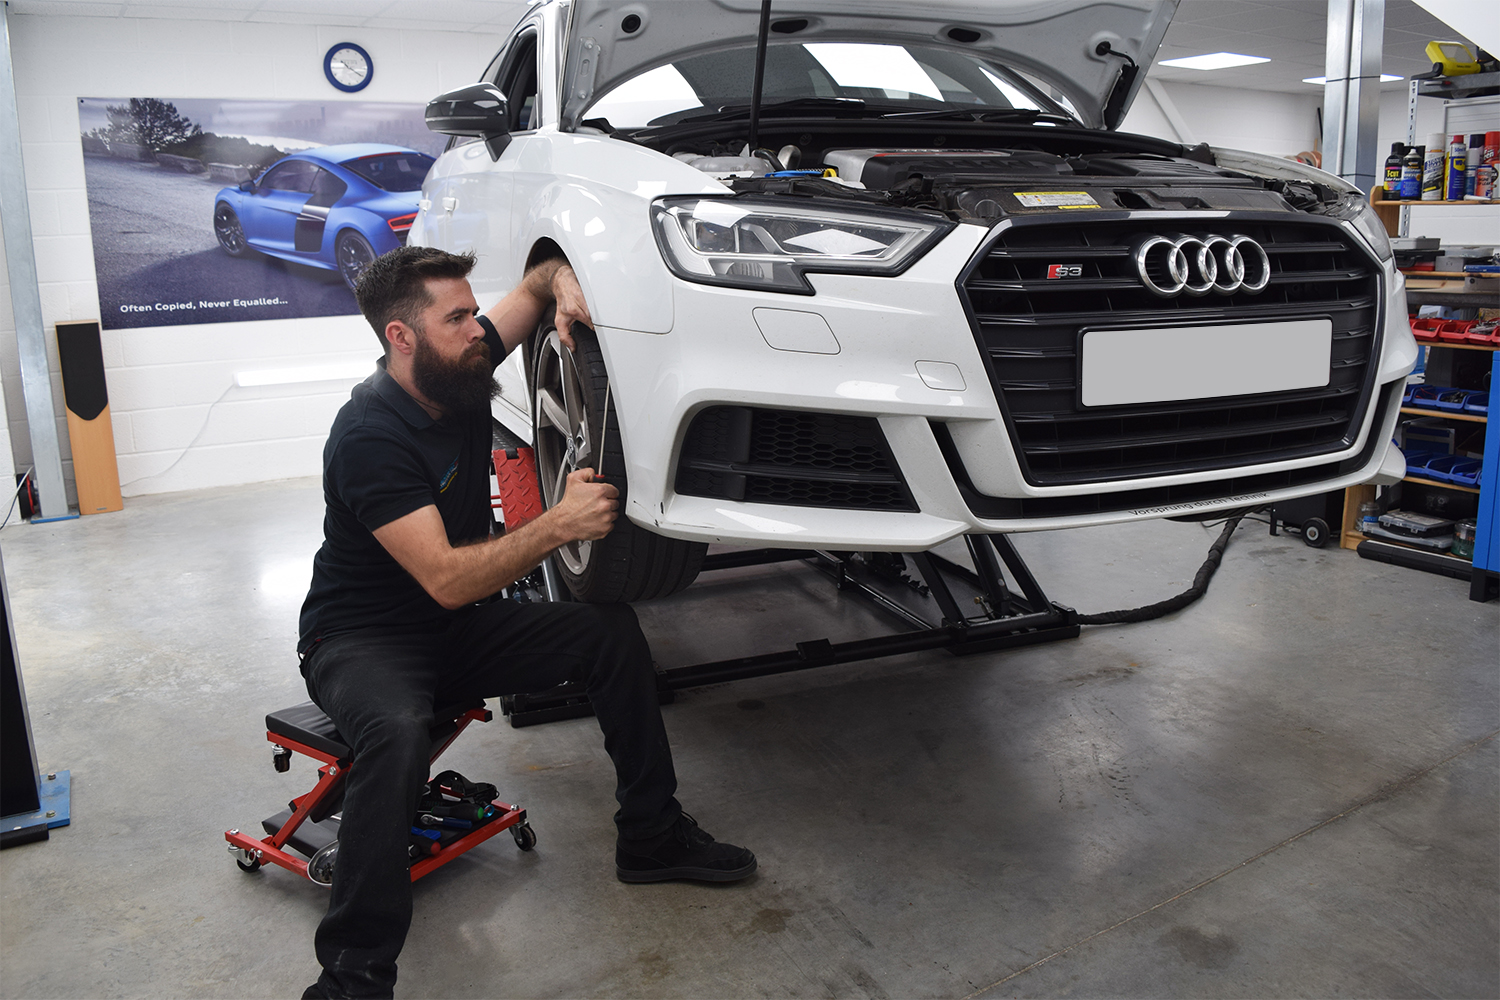
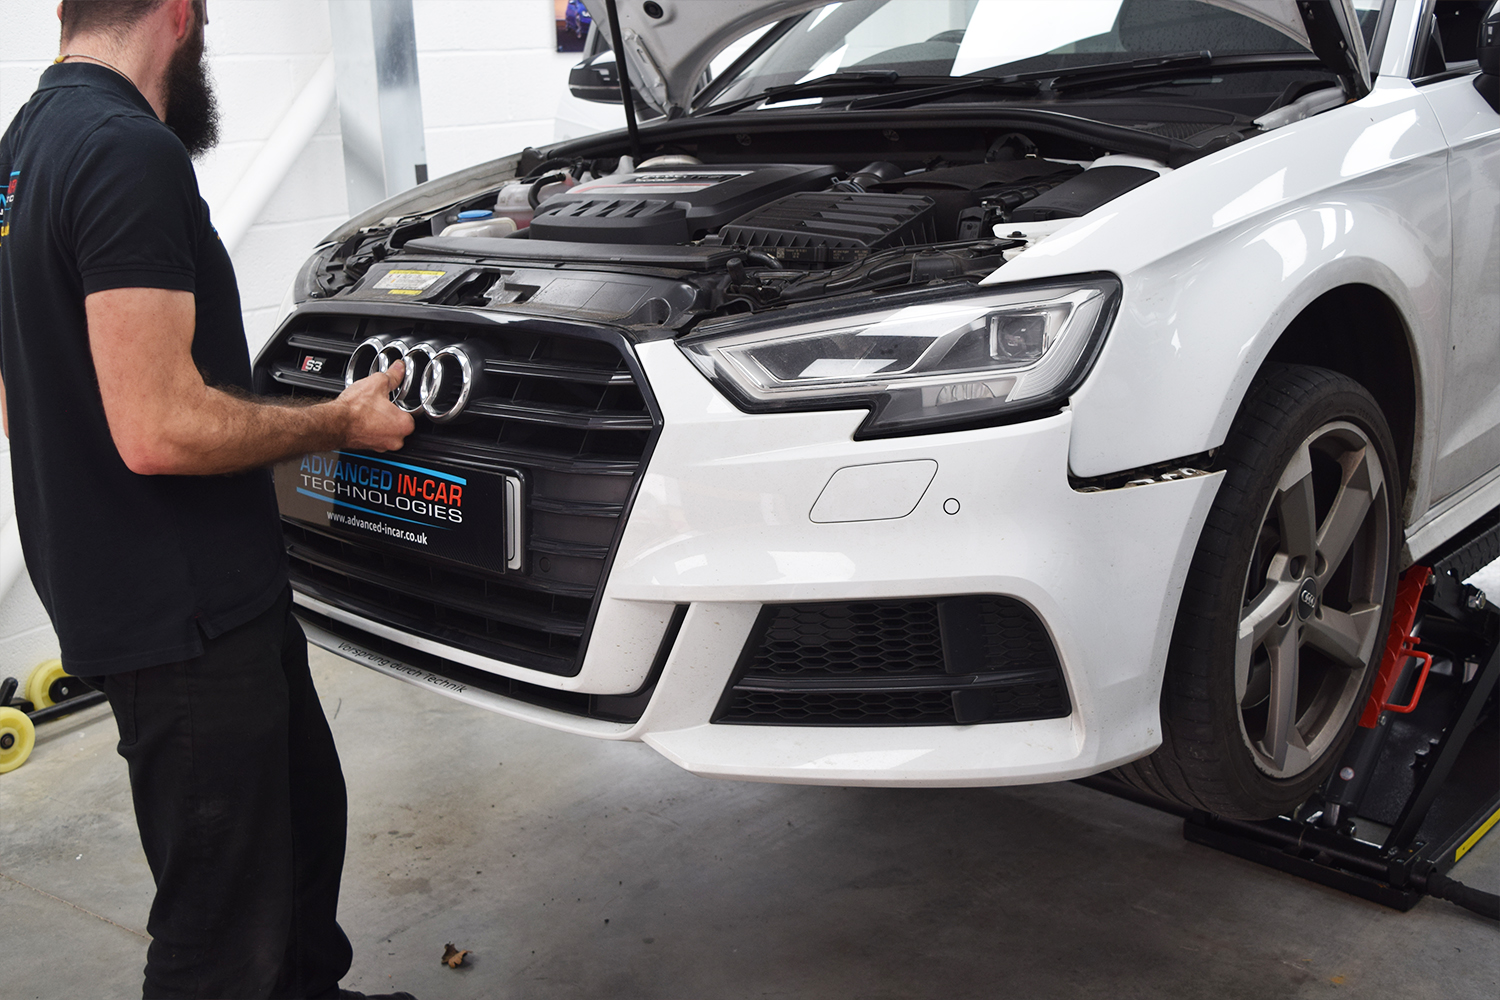
With the camera now installed, it’s time to lift the Audi S3 into position so we can start to remove the bumper to install the Genuine Front Sensors!
As you can see with the S3 lifted high up in the air it allows Rich to get access quite easily to every screw and bolt holding that bumper to the chassis of the vehicle. Much better in a seated or upright position then crawling around on the ground!
Once every screw and bolt has been removed and carefully stored based on its location the bumper is free to be disconnected and removed from the car. This is quite a tricky stage as there is lots to disconnect from the bumper from wiring looms to headlight washers.
When it’s off the car it gets put safely on to a special Bumper Holder called a “trestle” that is protected and keeps the bumper off the ground to allow us to work on it.
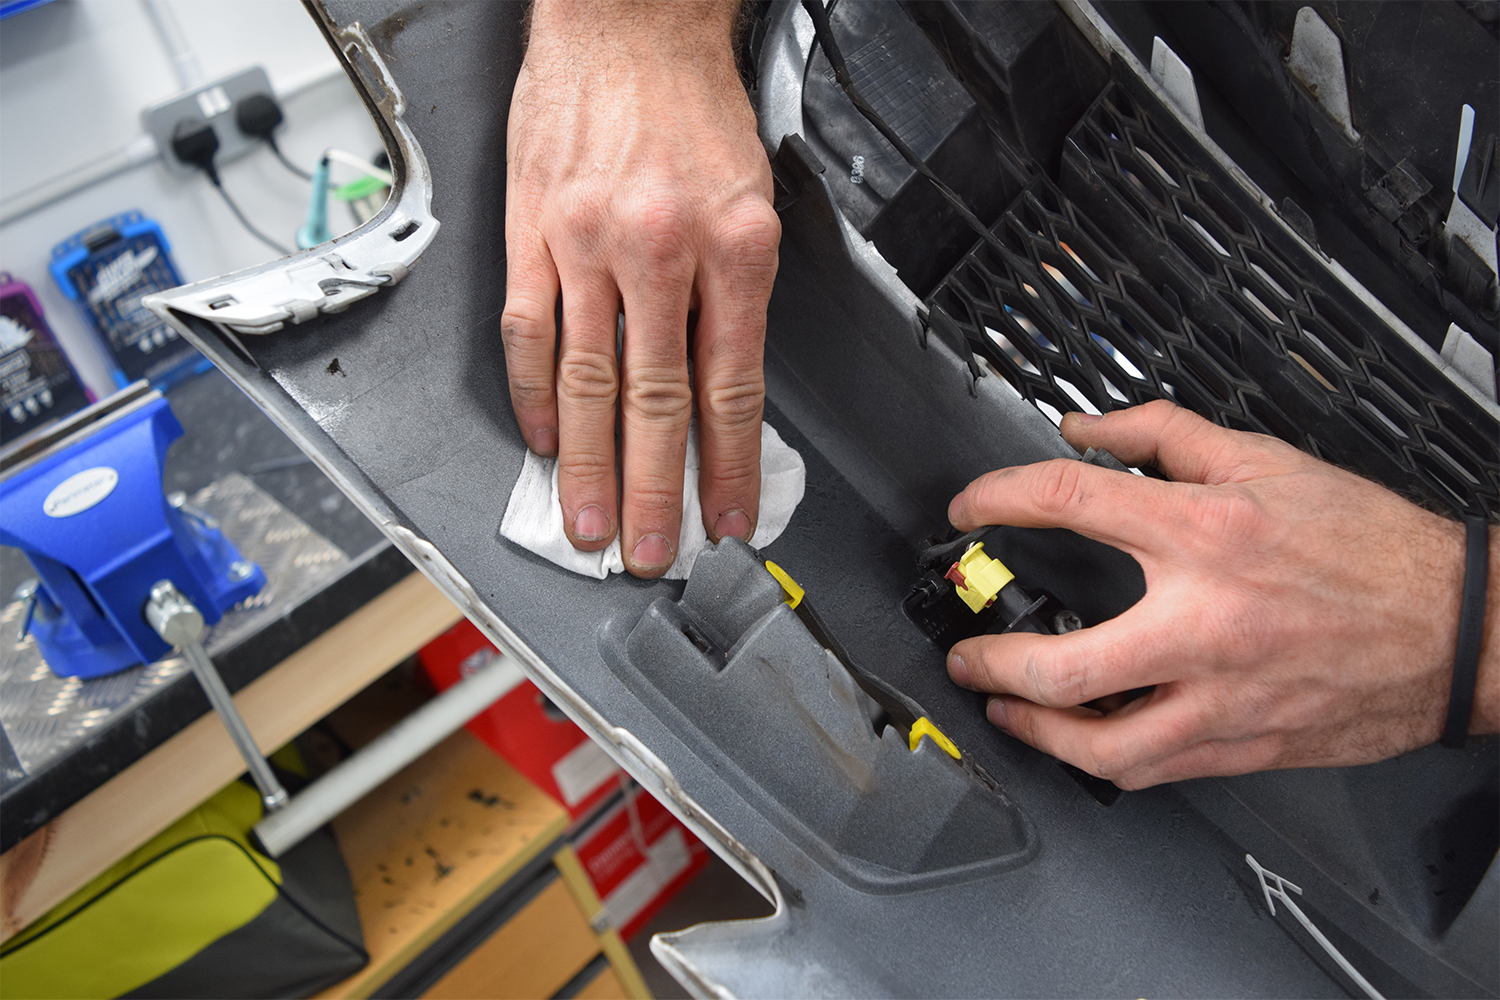
With the bumper safely removed it’s time to prepare the inside of the bumper. We use special wipes to clean off any dirt, grease or oils. This is super important as a poorly prepared bumper will mean the sensors will not bond correctly to the inside plastics.
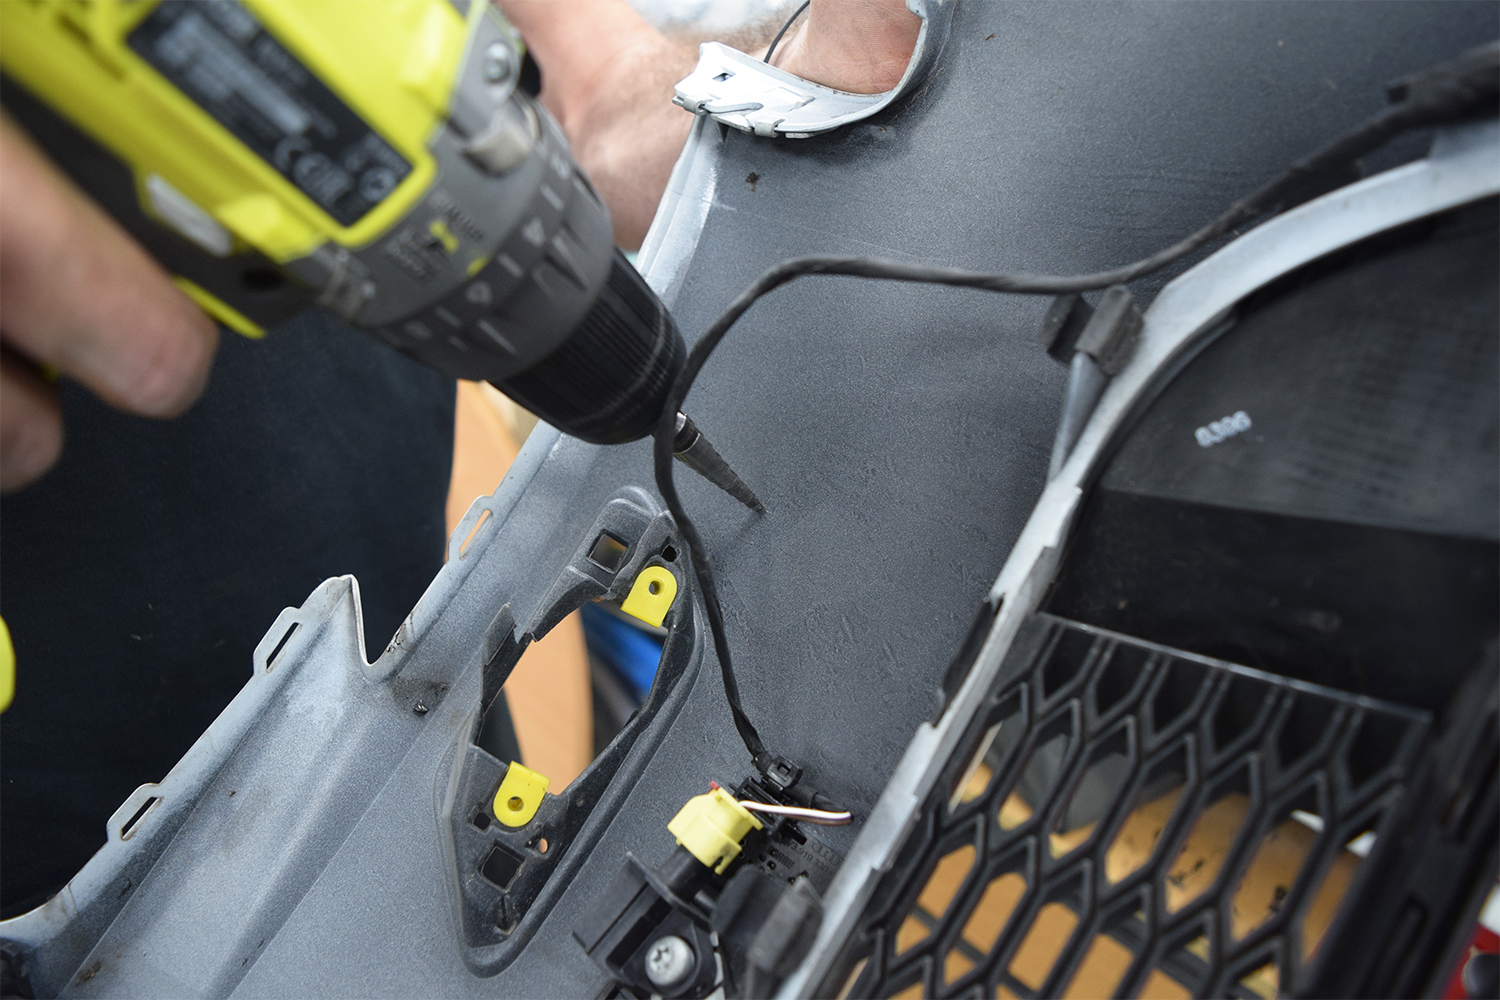
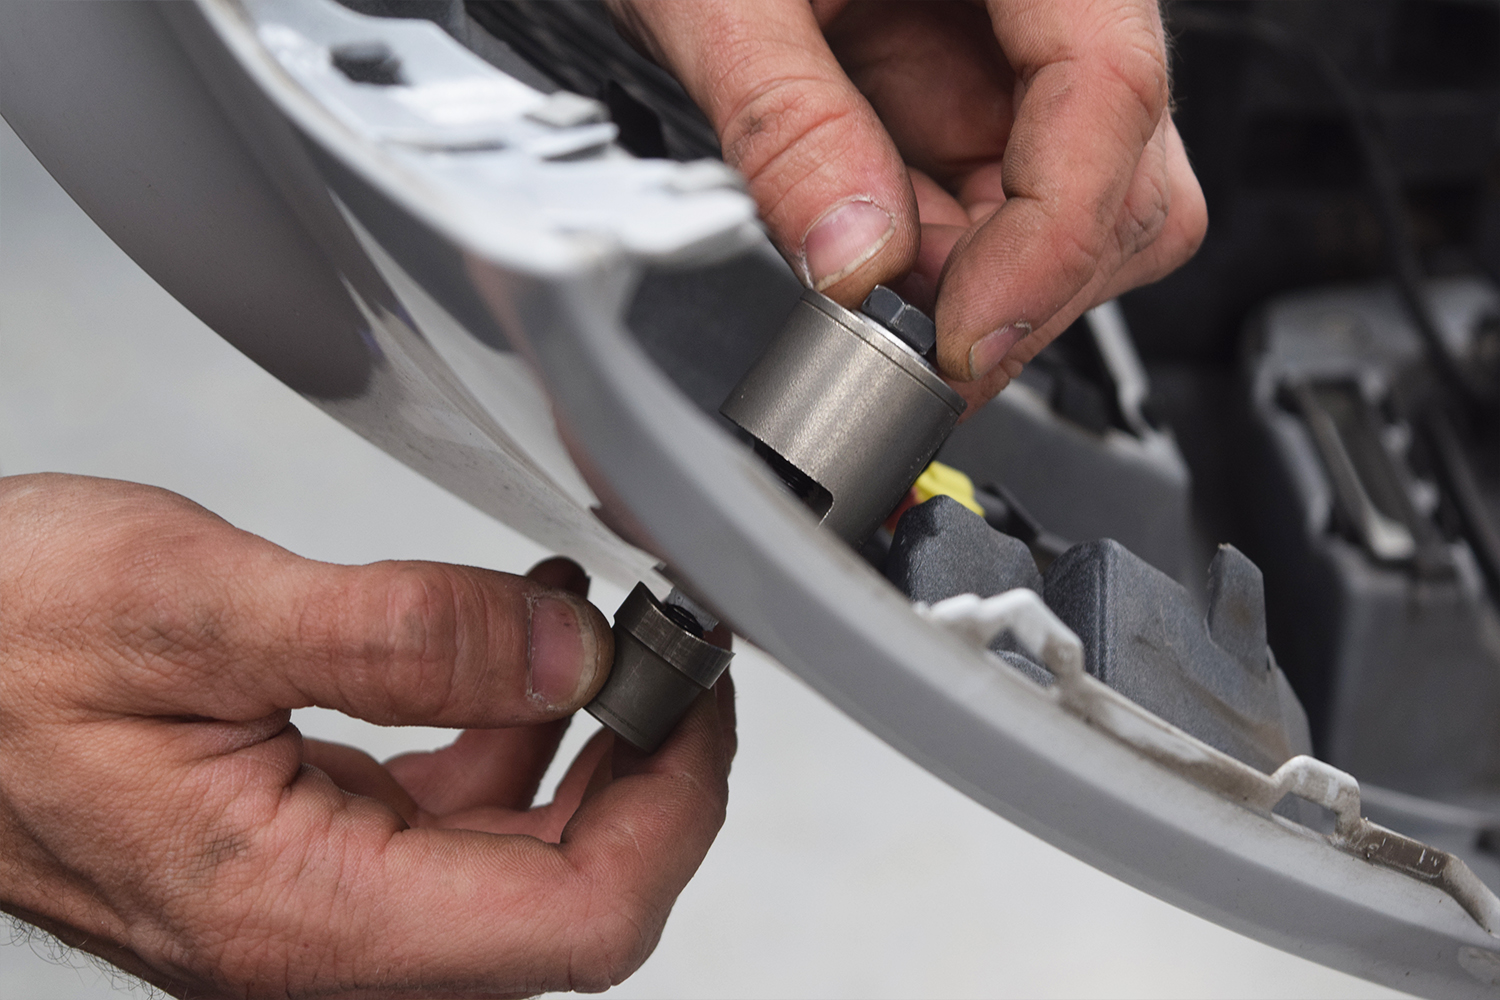
As soon as the inside has dried, we use a drill and specific step cutter which creates a pilot hole ready for the Genuine Audi / VW Punch to be inserted into the bumper to get that perfect cut.
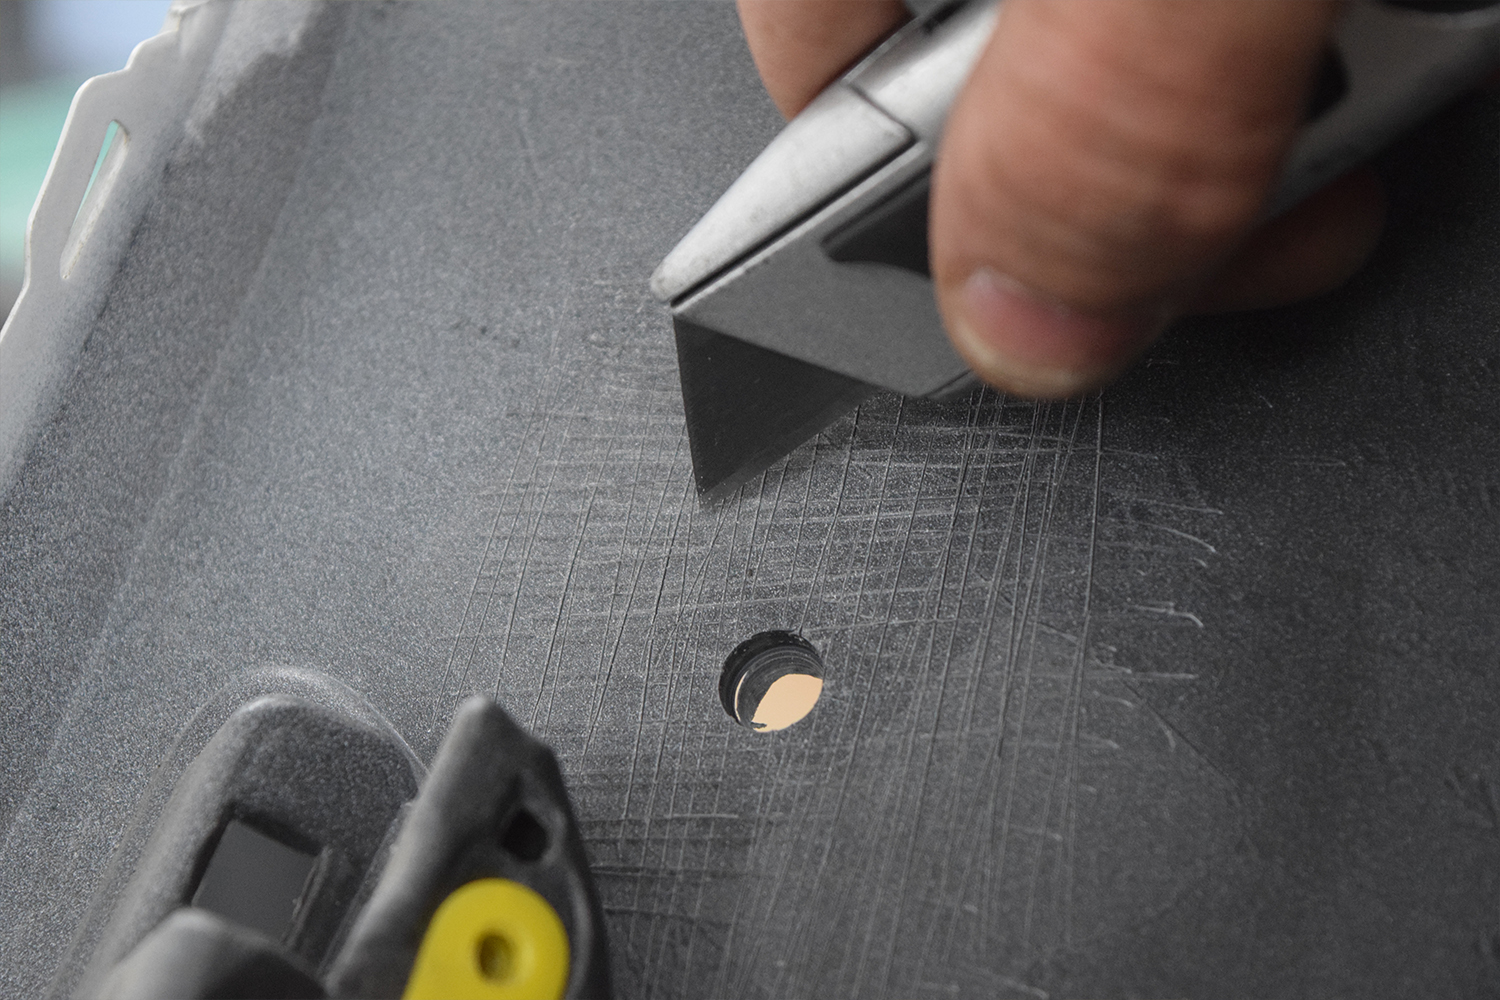
To make life easier for us and the fitting of the sensor we score up the inside of the plastics to give a rougher surface for the sensors and our special Automotive Hot Plastic Glue to properly bond. We do it before the punch goes in to minimise any risk of missing and catching the painted surface.
With our surface prepared it’s time to Punch! The punch goes in from both sides and using a special tool we carefully turn. This means the sharper side slowly cuts through the plastic and creates a beautifully bevelled edge with no scratches or rough jagged marks as seen with a drill saw. Whilst it’s cutting it also drags the paint through to make the cut even better.
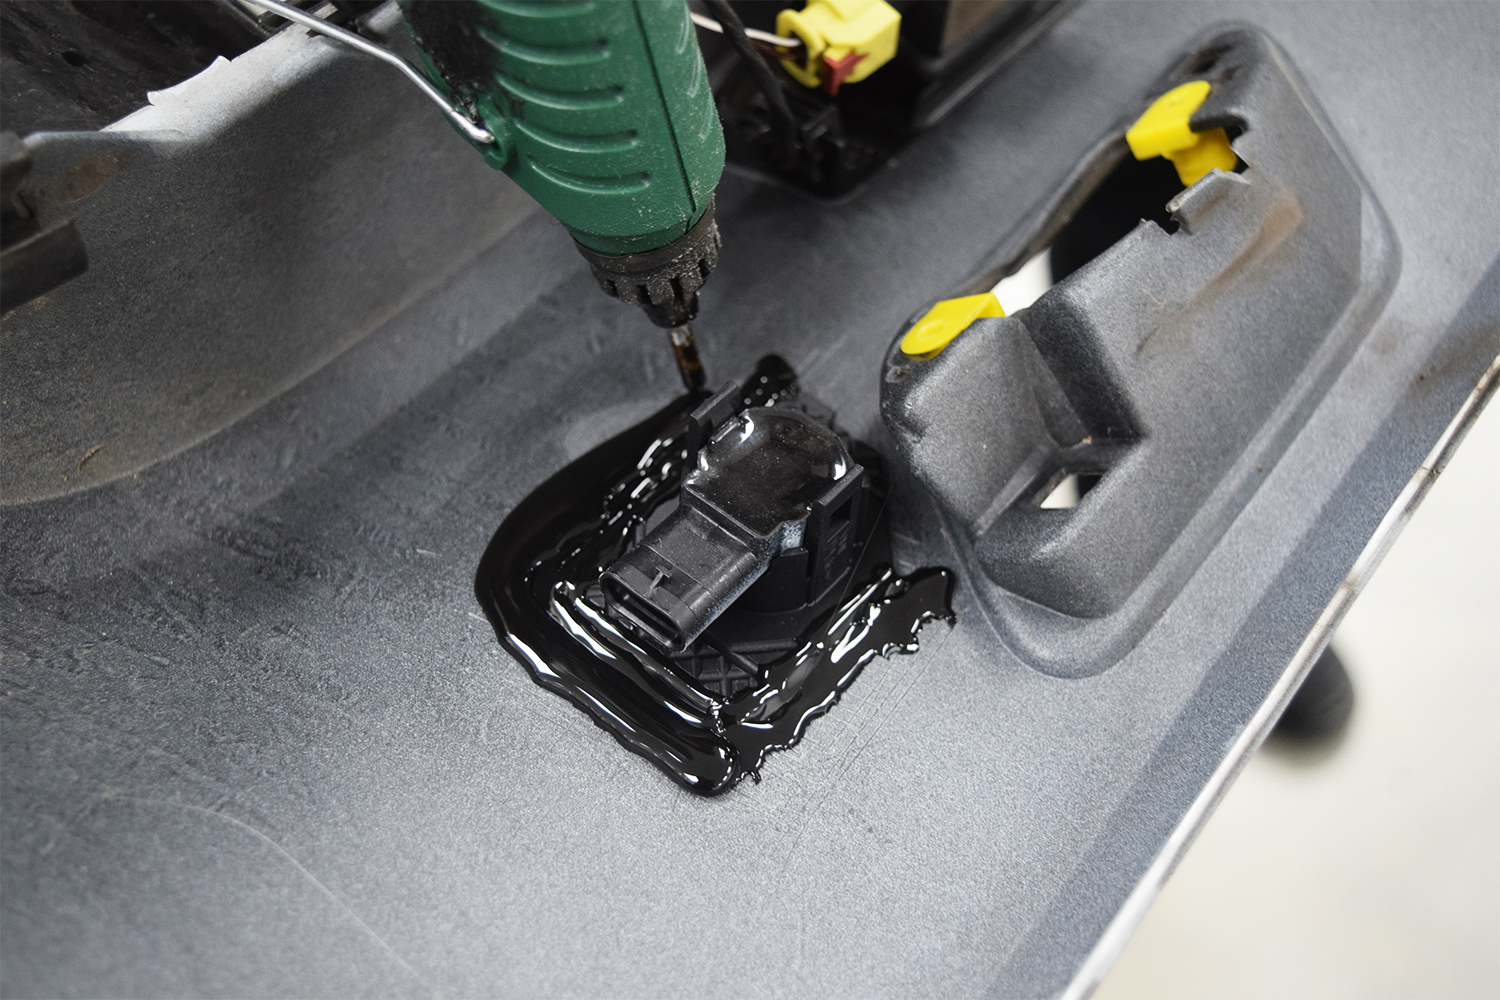
Once the sensor and its mount has been carefully located into place and bonded, we then use some of our special automotive “high bond” plastic glue. This gives the sensor mount something extra to grip on to and secure into place. The glue also flows into those grooves we cut earlier to get a real good grip of the plastic bumper.
With the mount and glue firmly set it’s time to add one final layer of bonding and protection. Automotive high bond tape. This stuff is super strong and not only does it help keep the sensor secured to the mount it also protects the mount and any water that might ingress over time.

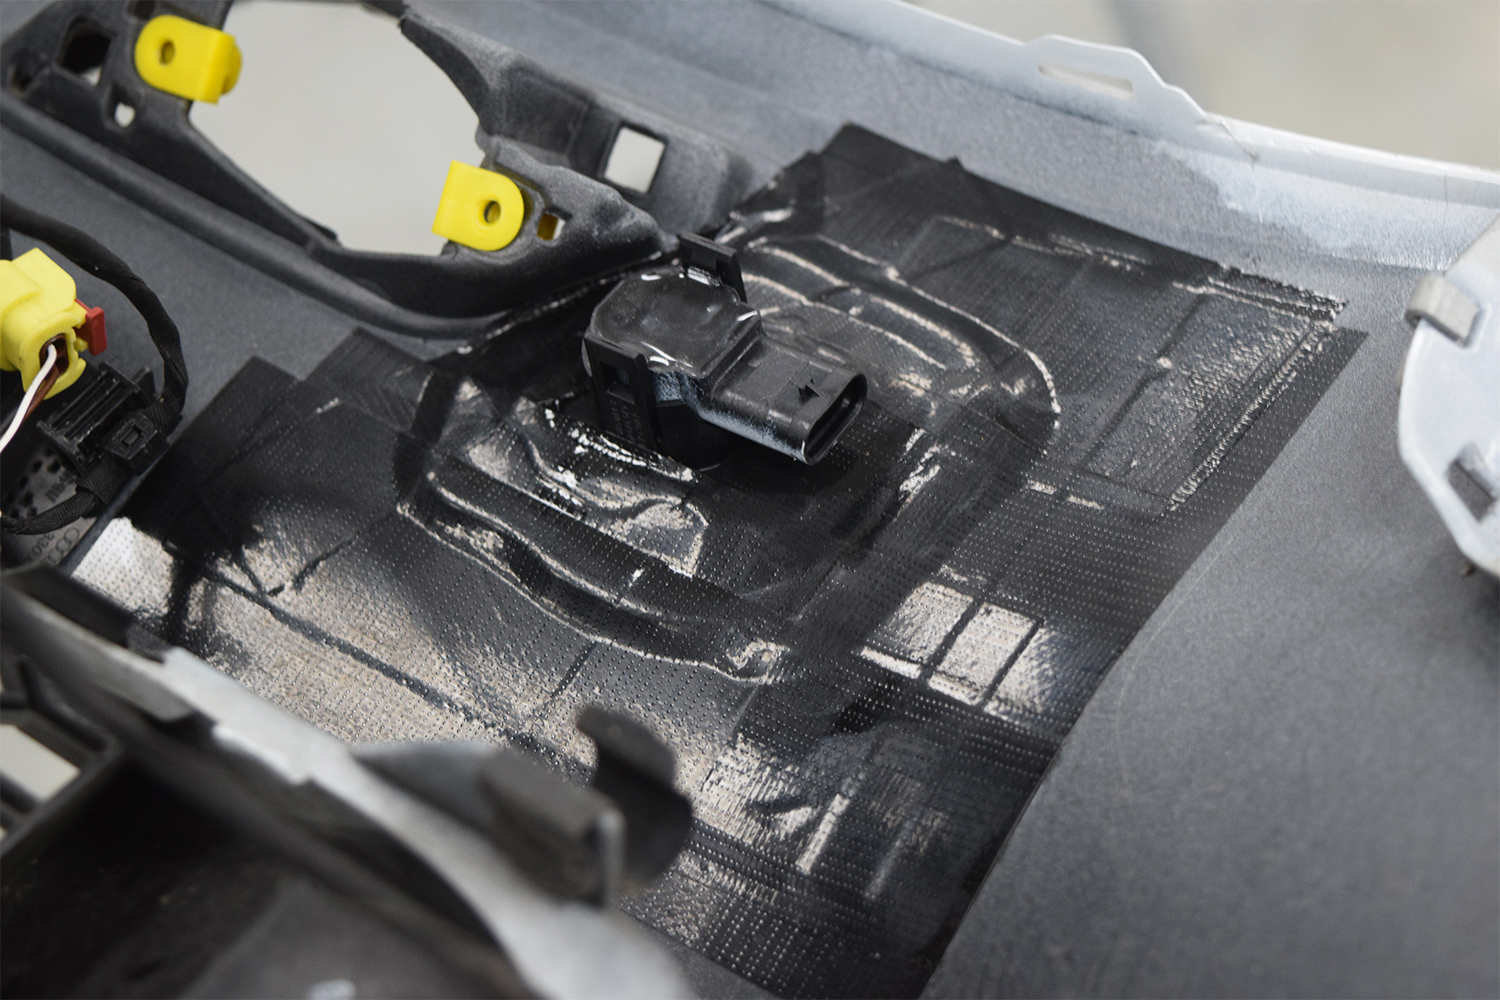
We repeat the exact same process for all four sensors that get installed into the bumper. There are two colour coded sensors for the outer edges and two plastic coded sensors for the middle grille.
With the sensors completed it’s time to move to the wiring. This is another important stage as the wiring must be carefully navigated from the bumper, through the engine bay and finally into the cockpit of the car and this is one of the longest stages of the retrofit. The wiring has to be secured every few inches and has to be protected from any heat generated from the engine bay.
As soon as the wiring is into the cockpit it gets integrated into the vehicle’s existing wiring harness and connected to the correct CAN Network for the vehicle to pick it up, much like a computer data network!
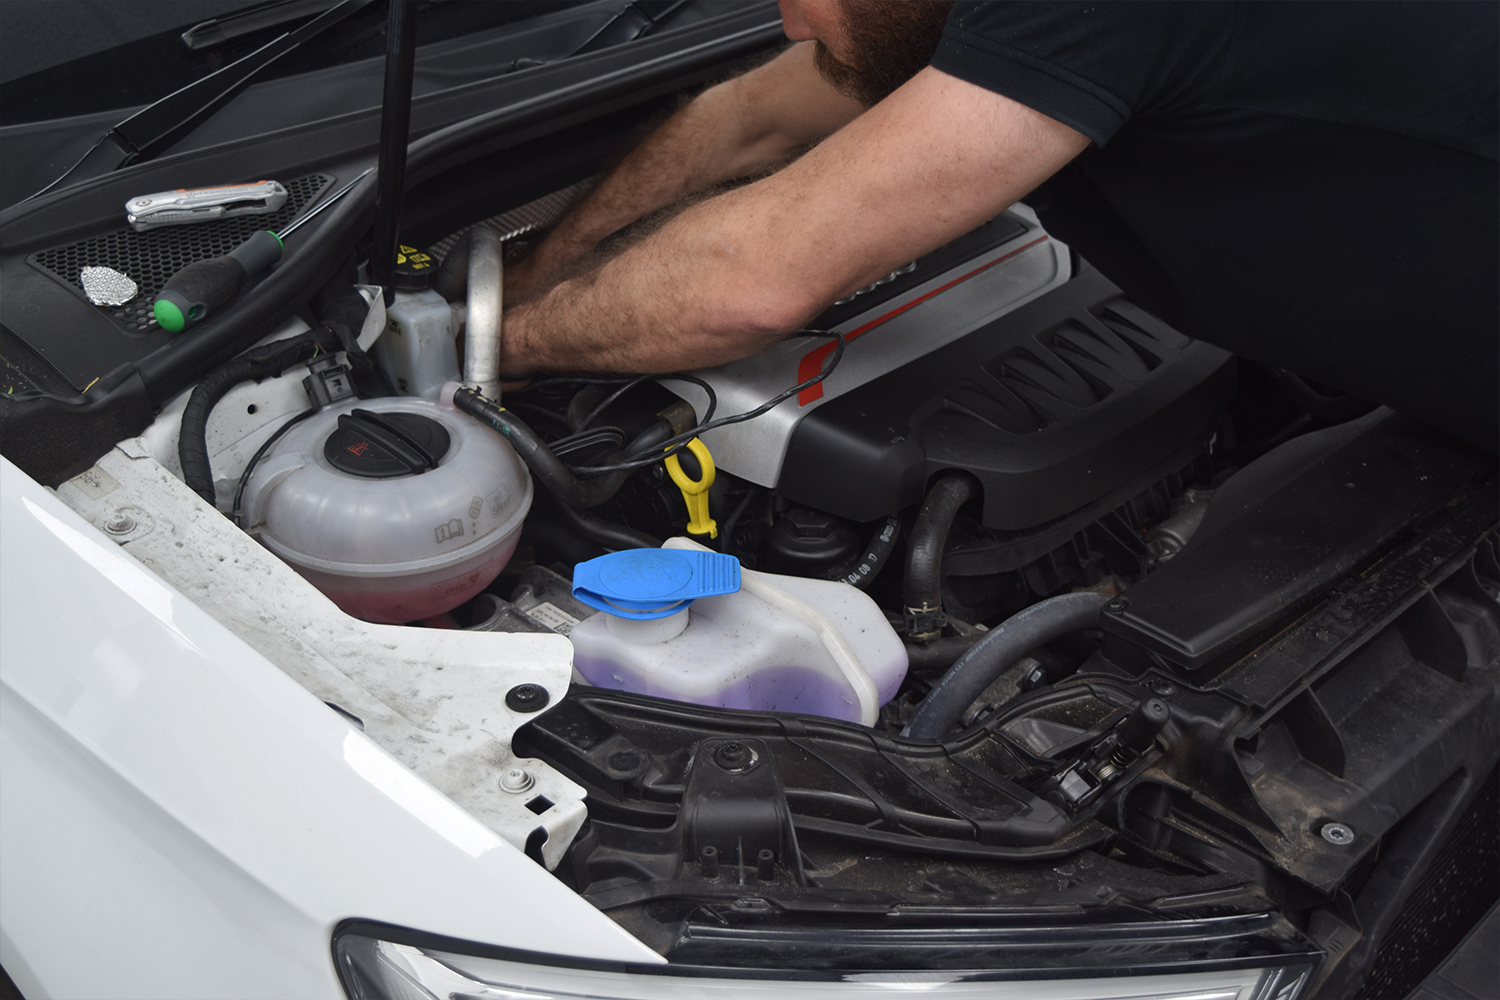
With all the wiring completed it’s time to re-assemble the front end of the vehicle and this is when the Genuine parts and attention to detail really come into play, those sensors look like they have always been there!
Again, we lift the vehicle up to the highest point to ensure that the bumper can easily be re-connected to the car safely and methodically. Each screw, bolt and clip are double & triple checked to ensure that the bumper is fully secure.
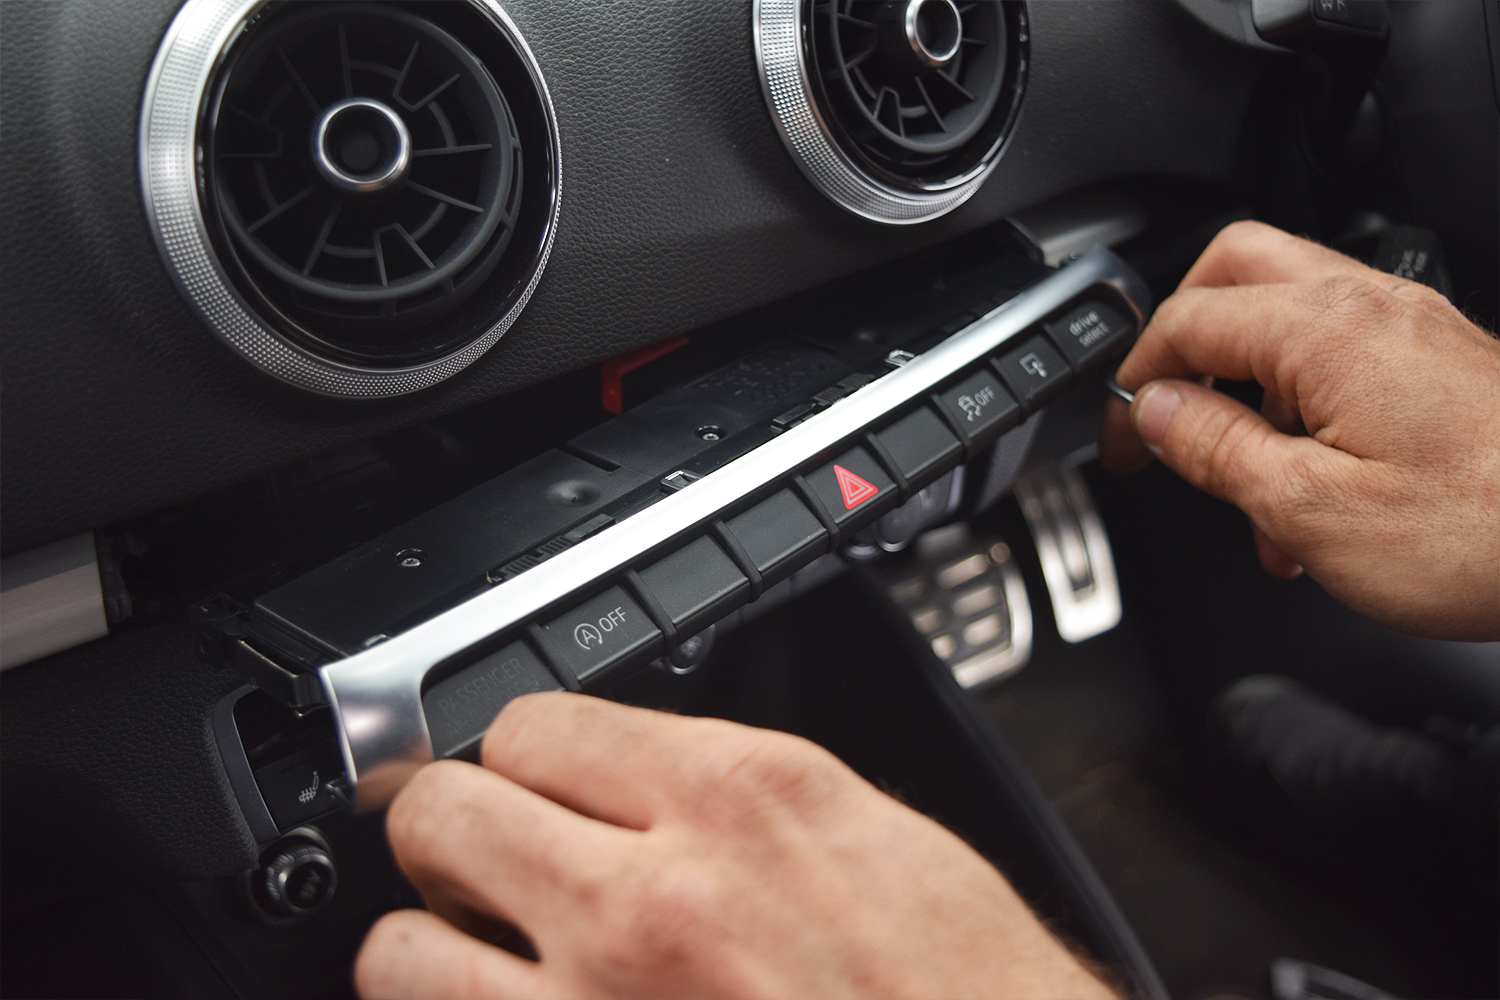
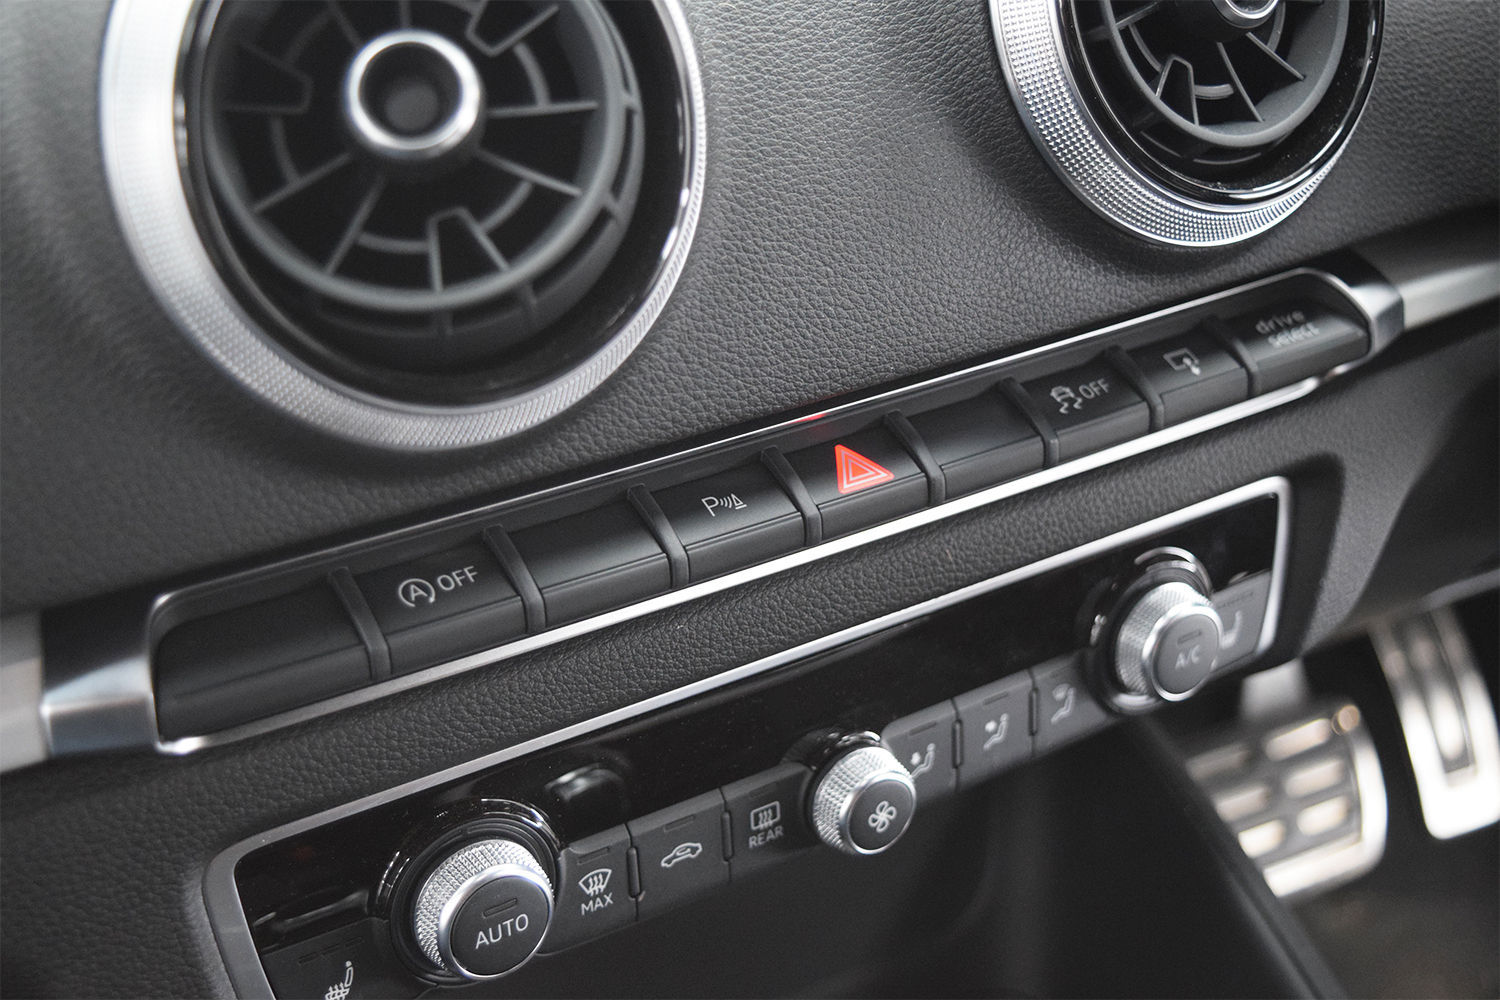
Next up is the all-important switch! This is what really proves it’s OEM equipment. If your front sensors do not have this new switch, then you do not have Genuine Audi Sensors installed. This switch is super important as it allows you to manually cancel or start the parking system when you want it, rather than going into reverse.
We remove the old existing switch and install all the new wiring.
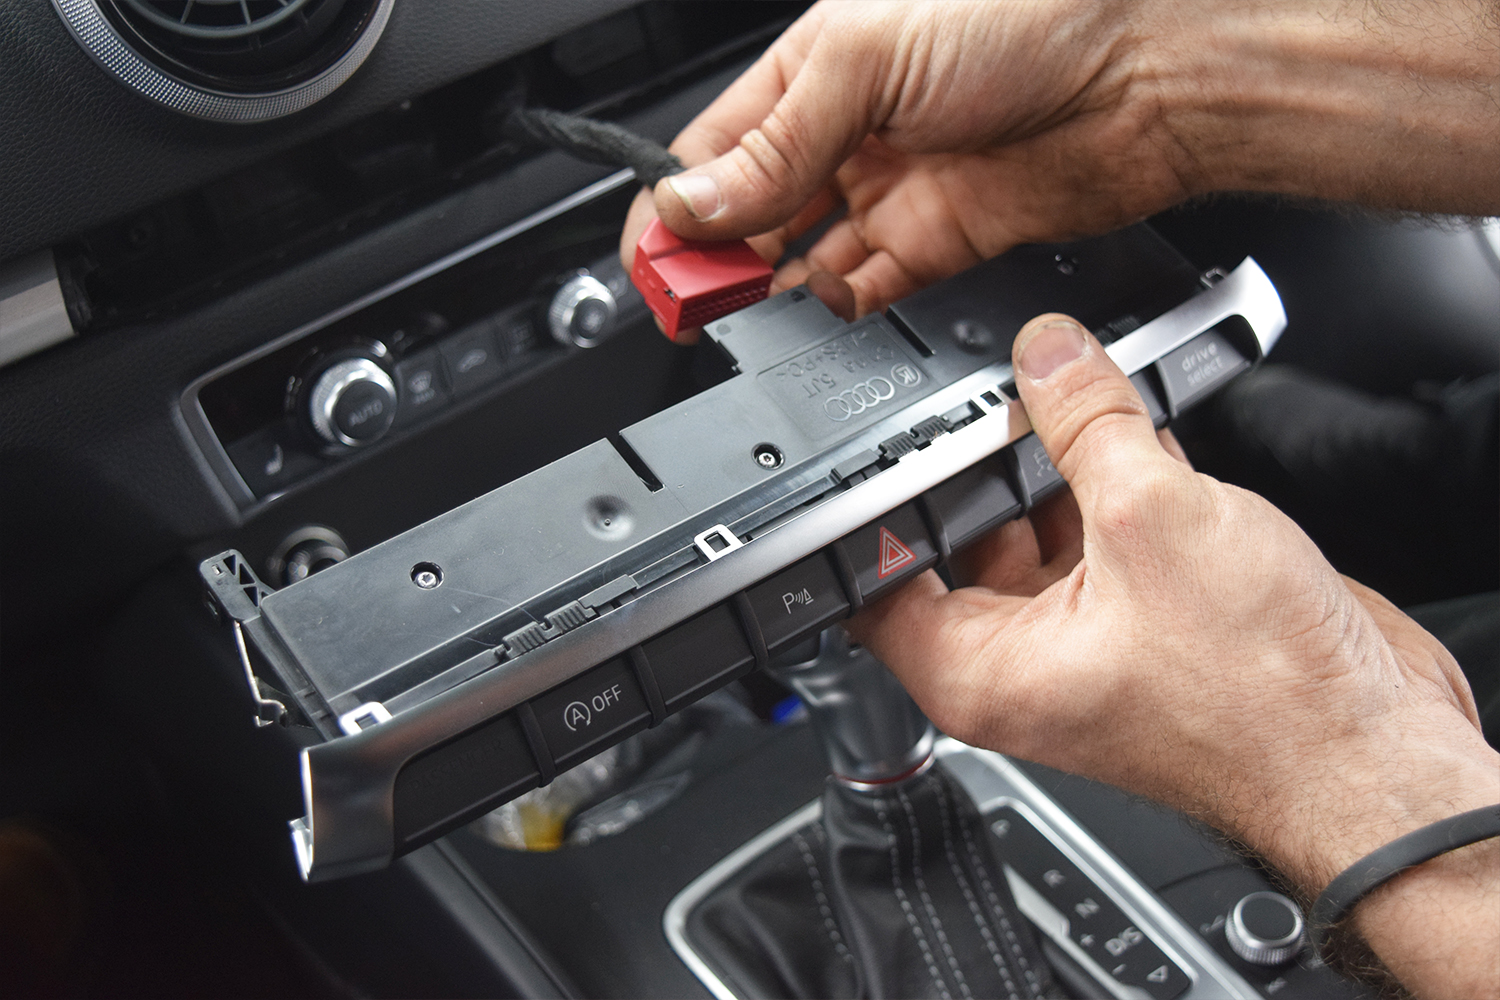
With the new PDC Switch in place it looks the part and you would never know that it wasn’t installed from factory. Once this is completed all the physical part of the installation has been completed.
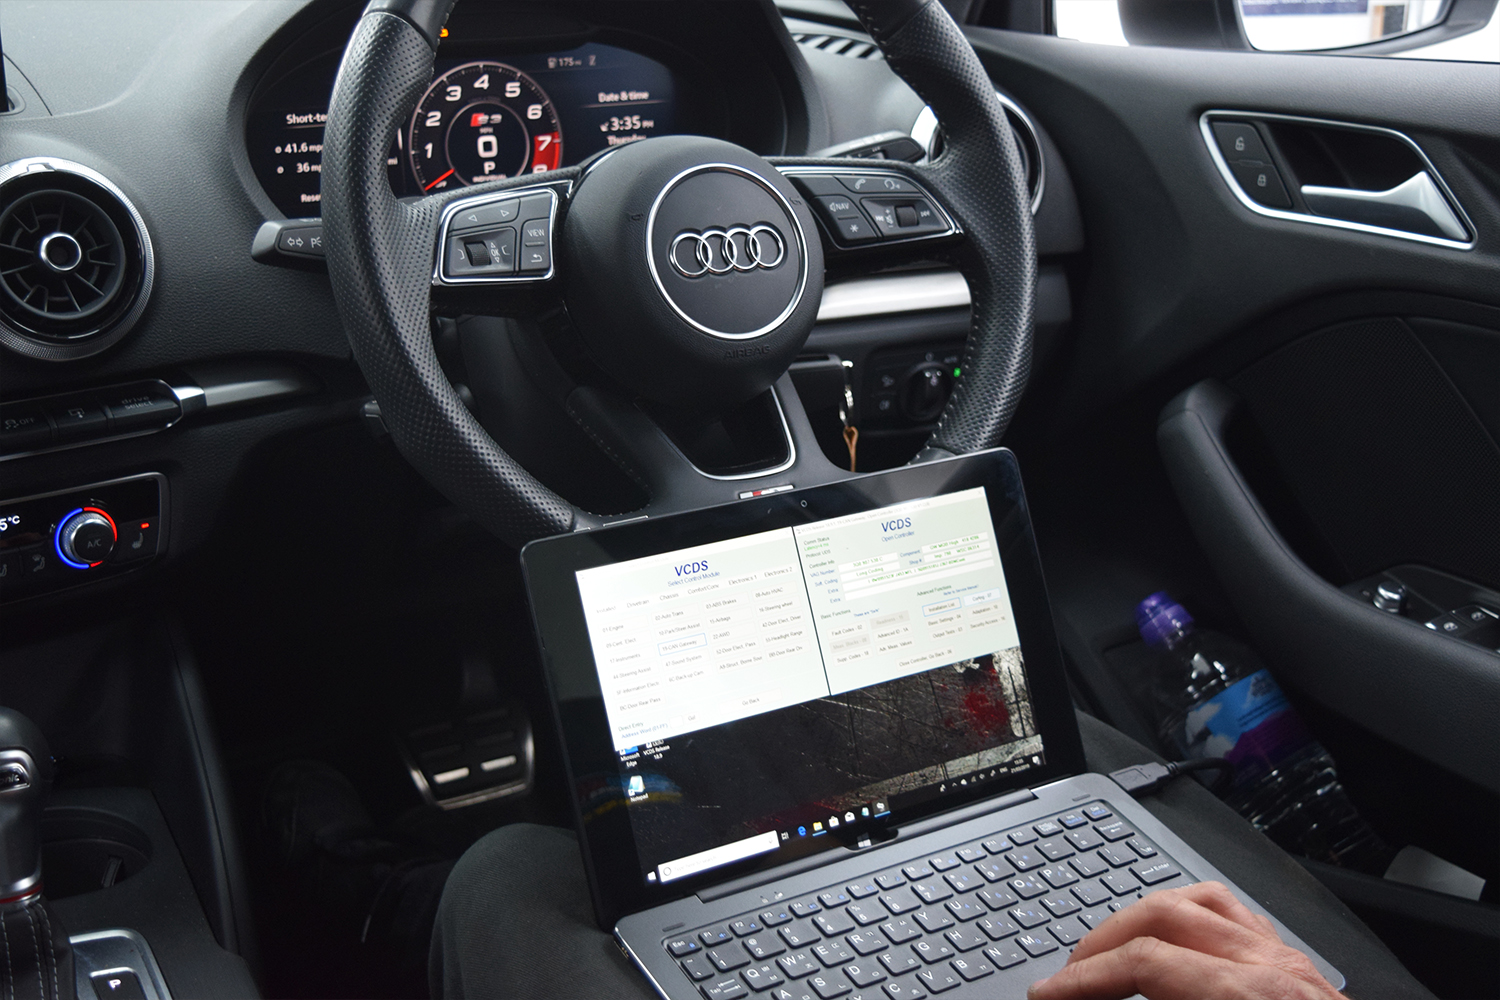
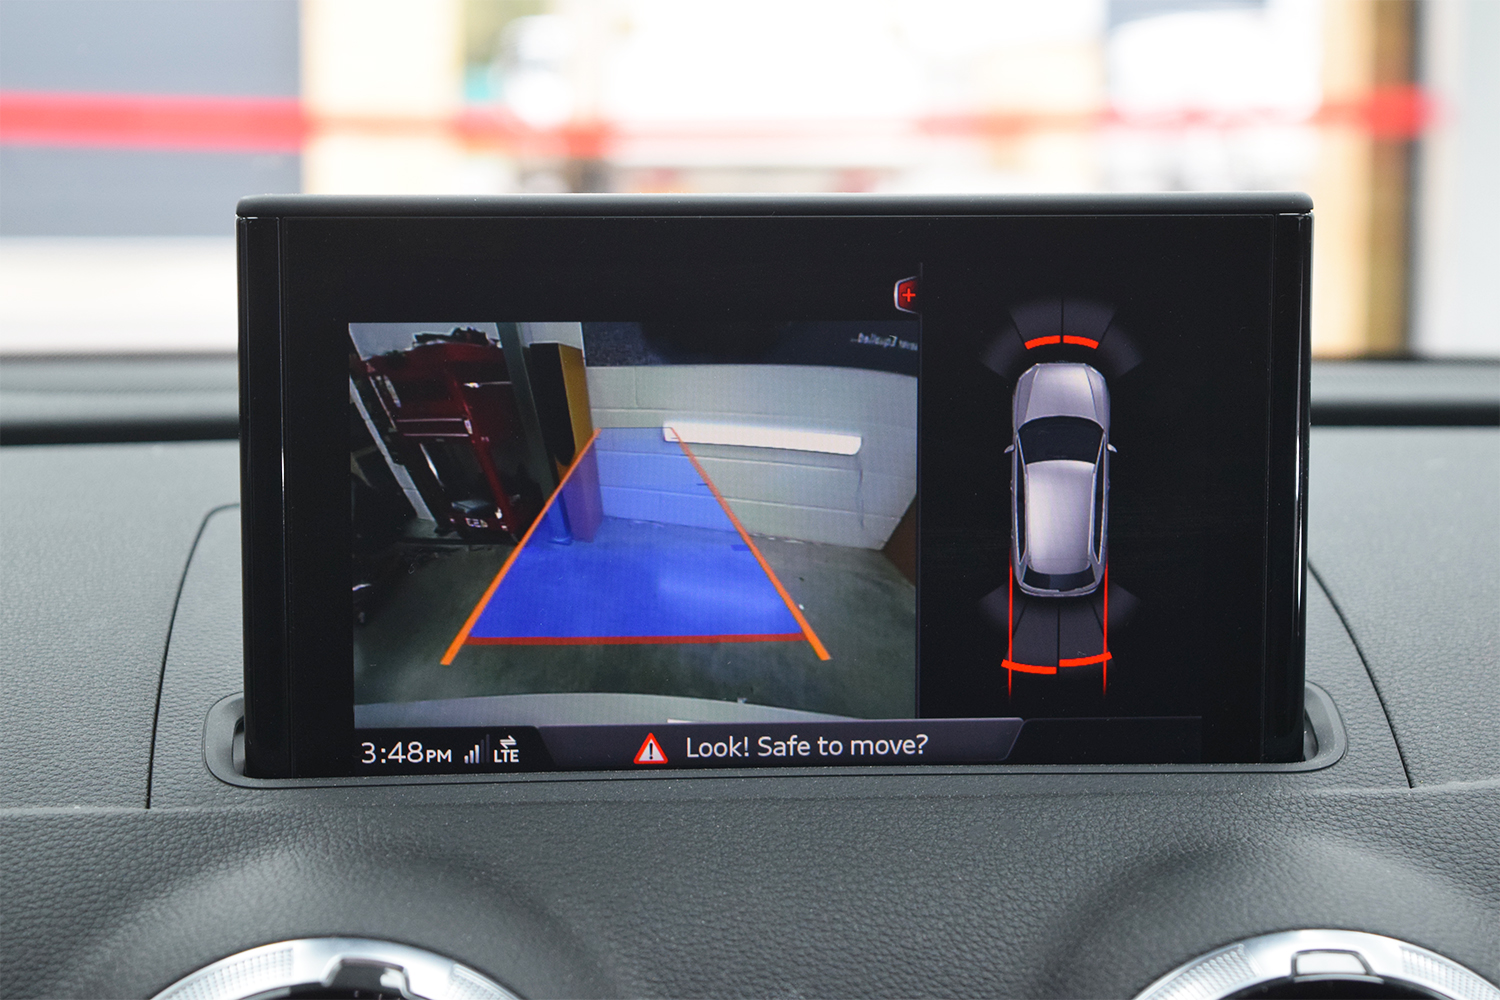
Now this is where the cool stuff begins, the coding! Much like a new printer at home we have to tell the car all this new equipment has been installed and how it is to use it correctly and specifically. This can take anywhere from 10mins to 40mins depending on the car. If this part isn’t done correctly then the new kit will not work, and possible errors will occur! We use a variety of software from VCDS to VAG-CAN Pro to ODIS!
With the coding all completed the retrofit is finished! Every part of the vehicle that has been touch or moved will be checked to ensure that it’s secure and free from any movement or vibration. Whilst this last visual check is happening, we perform our second scan of the day. This lets us know if there are any new faults since the first. If there is then we diagnose and remove them. These two scans are then stored and logged in case we need to go back to them in the future.
With all the visual checks completed and the scans completed we’re done and it’s time to perform our final test of the equipment and handover to the customer to explain what we have done, how we’ve done it. We also give an in-depth explanation of how to use the new equipment!
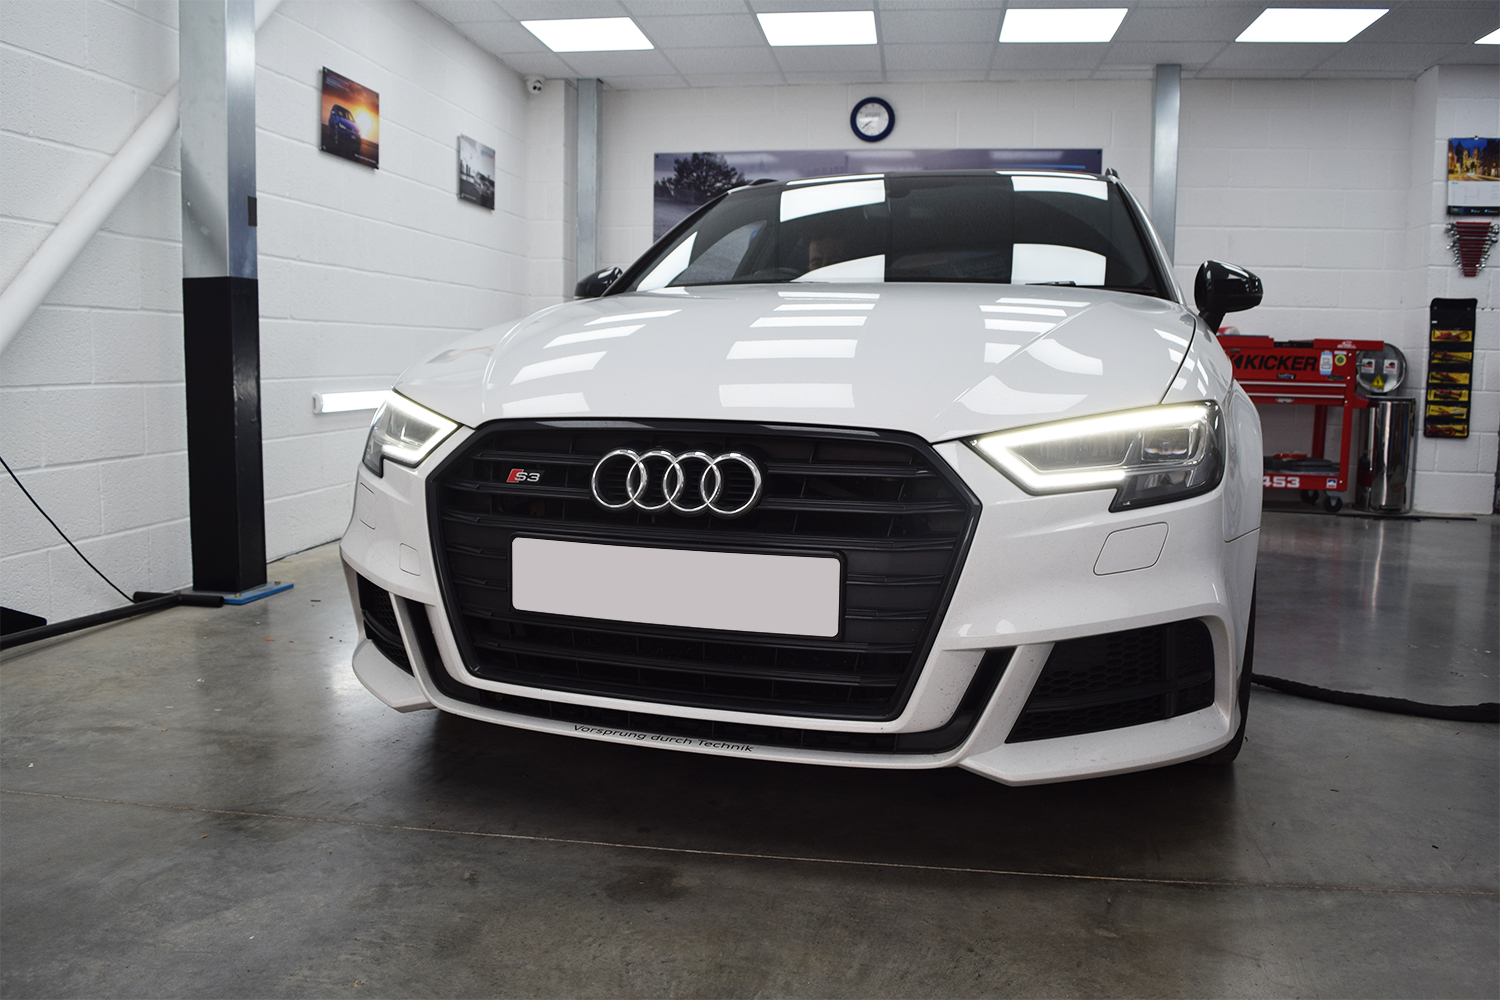
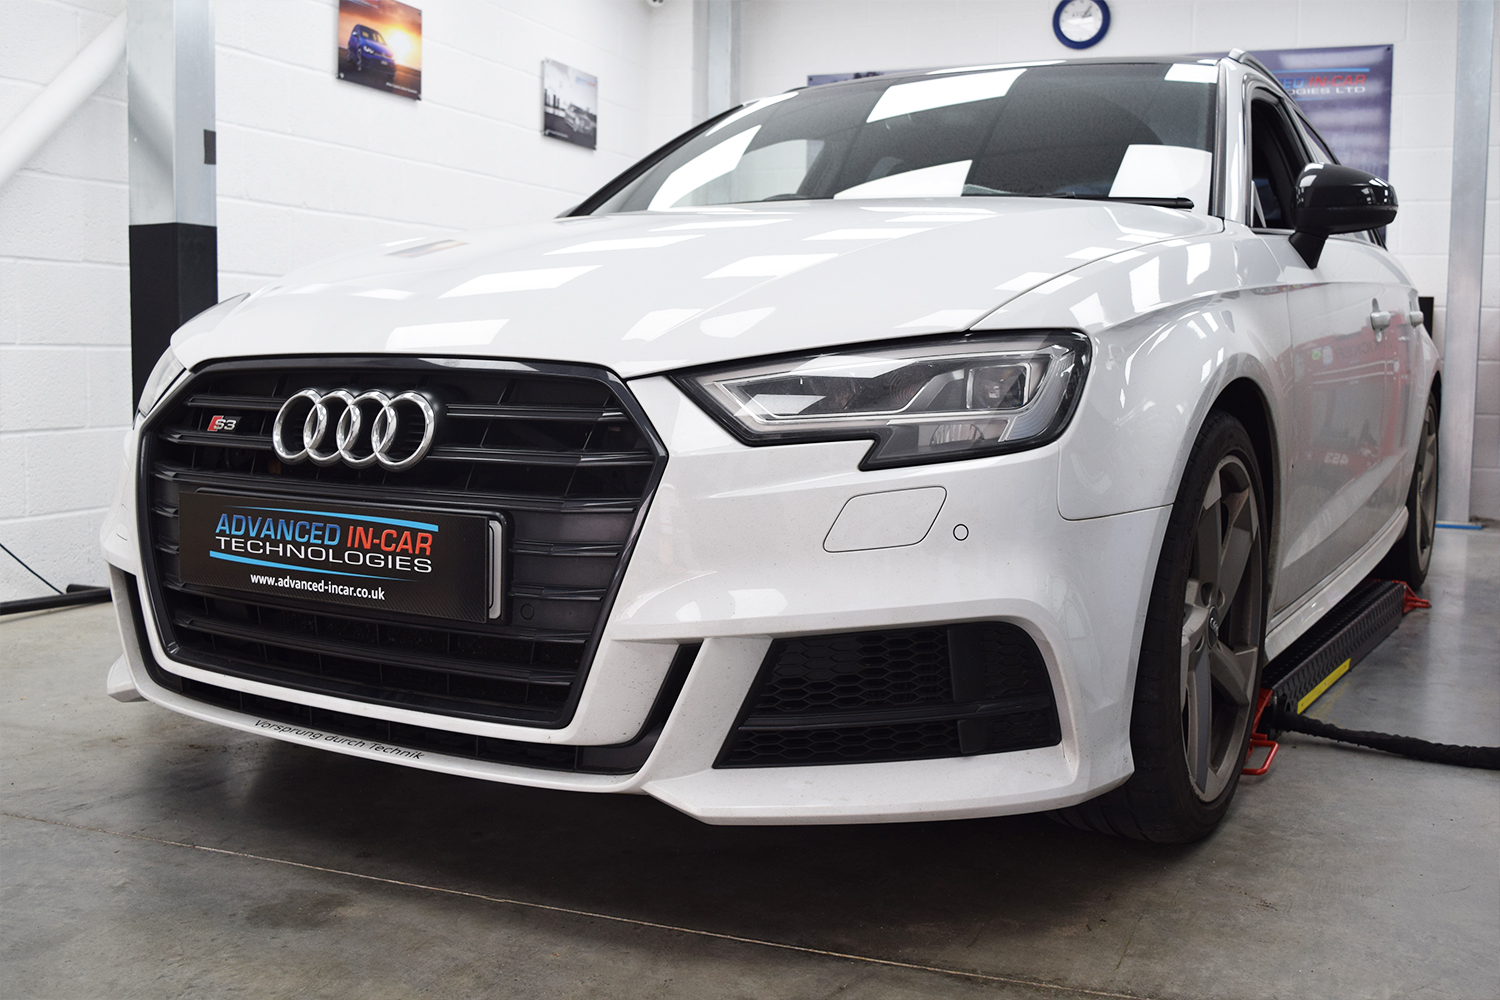
The next set of photos need no explanation but will show you the final finished article of what we have retrofitted.
Did you know, with all genuine Audi equipment that we install, we’re proud to offer a Two year warranty to complement our work.
Hopefully you can see from the level of work that goes on behind the scenes that you would never see we take great care with our workmanship and the quality of the equipment we use. It’s one of the reasons why are the UK’s most reviewed Audi / VW Retrofit company featuring over 300 5 Star Trustpilot Reviews which no other retrofit company in the UK can boast about. It’s a true indication of our passion!
I hope after reading this Case Study you feel fully informed about the process of installing the Genuine Audi S3 Front OPS Upgrade & Reversing Camera. Below are two of my favourite pictures after completion and I’ve also linked up to the YouTube video we filmed after the installation.
If you would like any more information, then please feel free to call us or use our Contact Form by Clicking Contact at the top of this page!

YouTube Video of Genuine Audi S3 8V Front & Parking Sensors with Highline Reversing Camera


![IMG_7830 copy[89]](https://www.advanced-incar.co.uk/wp-content/uploads/2024/12/IMG_7830-copy89-scaled-600x462.jpg "IMG_7830 copy[89]")