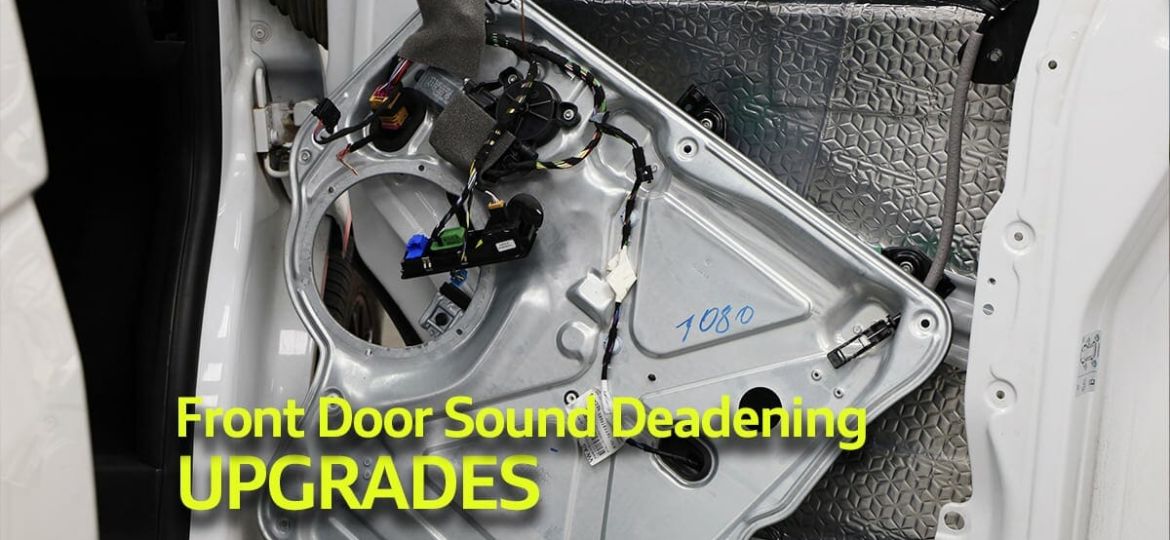
Why is Sound Deadening so Important?
When it comes to upgrading your vehicle with a new speaker system it’s just as important to treat the van with the appropriate level of Sound Deadening Treatment as it is fitting the best audio equipment available. This can come in many different forms and brands but from experience, the more you can do, the better to create the perfect “audio environment”.
Every installation company will have their own ways and means of achieving a good level of sound deadening and sometimes it comes down to personal preference of how to do this and with what product fitted where.
There is no right or wrong way of doing Sound Deadening as long it’s done in some way to help the environment the speakers are in work to their best ability.. (Obviously it must be applied correctly)
We’ve come up with 4 different levels or “Stages” of what we feel works well to give the equipment the best environment to work in. Not only will it help the audio perform better but it will also help eliminate extra resonance, vibrations, road noise and improve the overall sound in the vehicle.
As mentioned, there are lots of different brands and we use a mixture of Silent Coat, Dodo and SKINZ depending on what is required or available at the time of install. Whilst they are different brands, how they are made, and work are exactly the same. We do however try to primarily use Silent Coat which is what we’ll use in how we explain the different stages.
For the below stages which I’ll break down into in a moment, we are using a 2mm Sound Deadening Sheet and then a Sound Absorber.
The Types of Products We Use
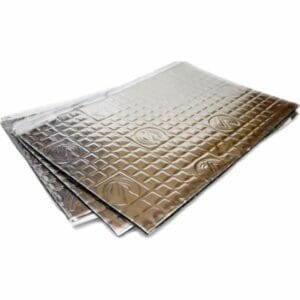
First up is the 2mm Sound Deadening. This is typically a polymeric based damping material or if you want its exact description it’s a rubber visco elastic polymer active layer! This is then covered in an Aluminium surface to finish off.
Each sheet has a great adhesive backing which means that not only is it flexible and easy to cut it sticks and moulds to the door panels super easy!
Its main goal is to lower panel resonance and absorb vibration. It helps prevent nasty rattles, eliminate road and outside noise, and dramatically improve the interior sound of the vehicle!
Typically, each sheet of Silent Coat Sound Deadening is 375 x 265 mm and weighs approx. 350g
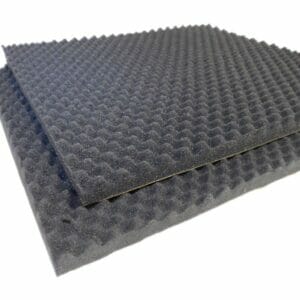
Next up we have an Acoustic Foam which Silent Coat call Absorber 15. On first impression it might remind you of the inside of a Recording Studio or an Egg-Box. You’d be right on both accounts!
Its fancy description is a polyurethane foam material that helps achieve superior sound absorption and even further create that perfect acoustic environment. The material is designed primarily to absorb unwanted high frequencies and because of the “egg-box” shape helps it absorb 30-40% more sound than the average material.
The Absorber is 15mm thick, self-adhesive and water resistant and helps absorb high frequencies, prevent trim rattle and diffuses rear speaker energy.
Each sheet of Absorber is 600mm x 500mm and weighs approx. 680g per sheet.
Our Sound Deadening Stages
We’ve put together 4 separate STAGES that we feel with give you the best environments for your front doors depending on budget and how far you want to go with your car, van, or motorhome.
All the pictures, amount of product used is based on the VW Transporter T6 as it’s by far the most popular vehicle we have been upgrading so we’ll use it as a glamorous model.
STAGE 1
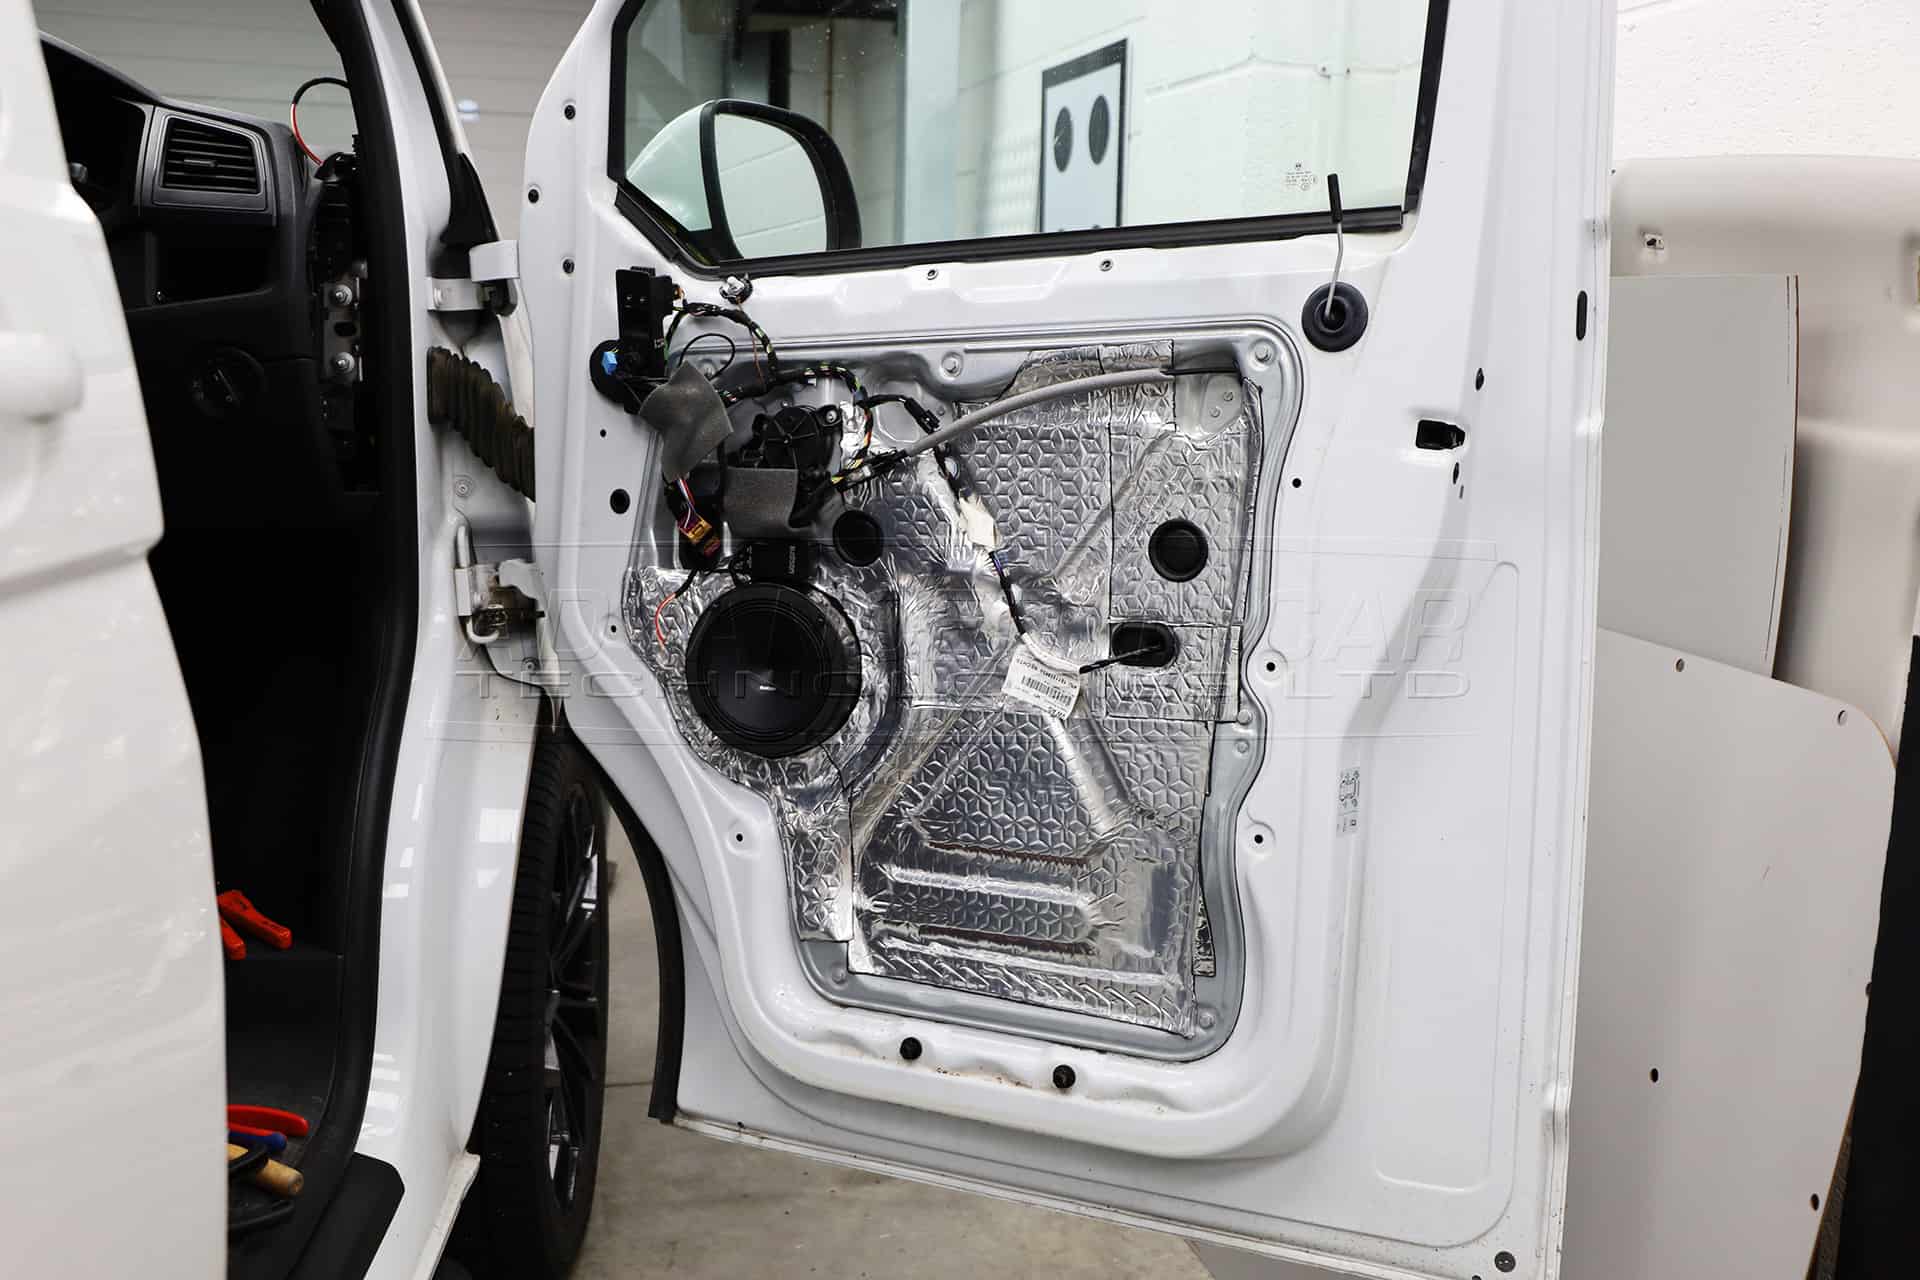
- 2mm Sound Deadening – Main Door External Regulator Panel

This is the bare minimum we would always recommend when fitting any new front door speakers to your vehicle and we will very rarely do an audio upgrade without this stage.
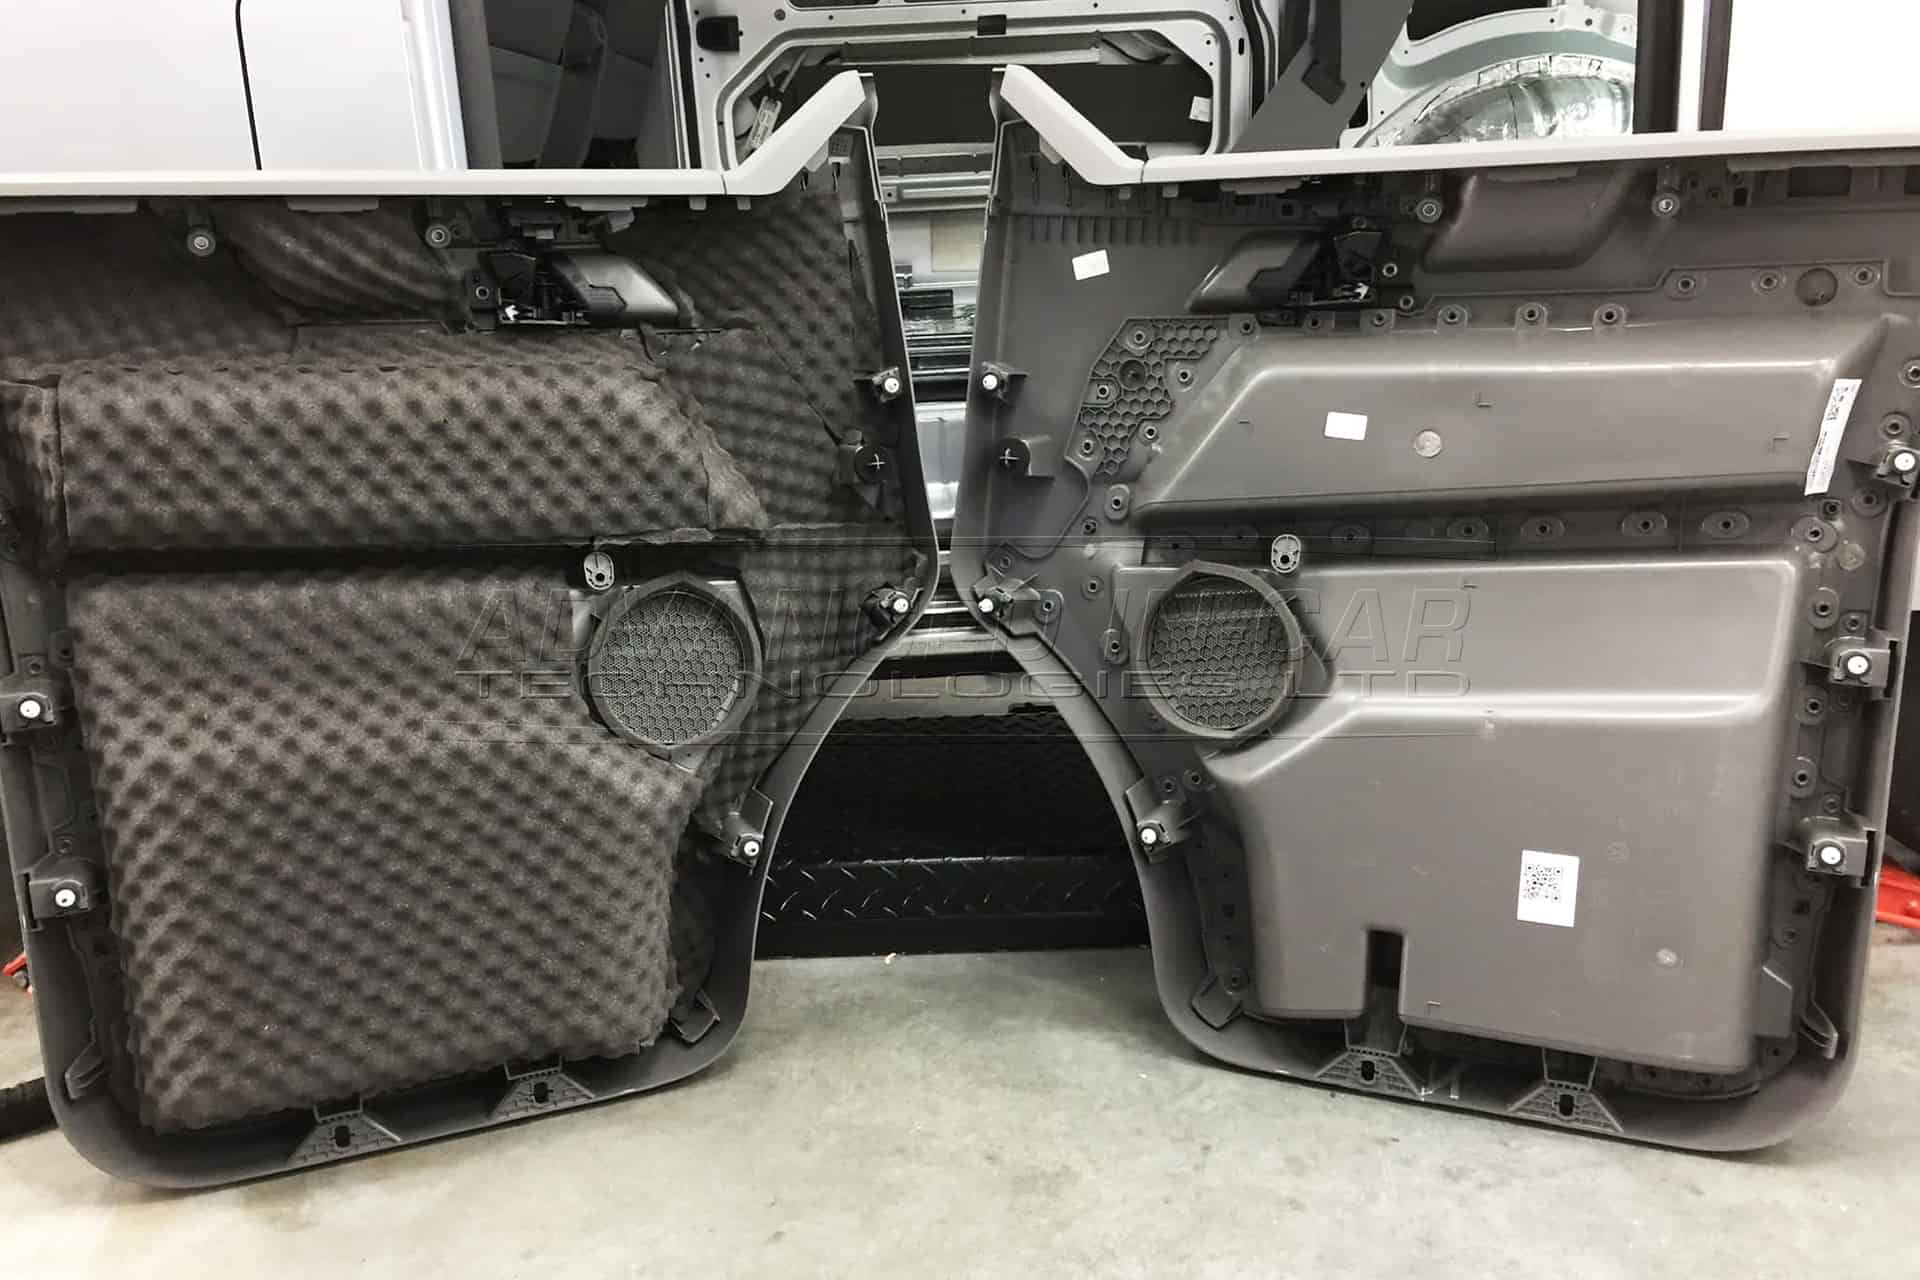
Once the new speaker has been installed, we try and cover the majority of the main door regulator panel (That holds the speaker, window regulator and other assorted electronics) with Silent Coat 2mm Sound Deadening. We try and cover as much of the metal work as possible and around the speaker collar.
For the best amount of coverage on this panel we use around 5 sheets per door. The material is fitted, cut and shaped to look as neat as possible. Roughly you’re adding about 1.75kg per door and 3.5kg in total to the vehicle weight. (If you’re interested in knowing)
STAGE 2
- 2mm Sound Deadening – Main Door Regulator Panel
- Sound Absorber – Inside Plastic Door Card
For this stage we’re doing the exact same 2mm Sound Deadening on the Main Door Regulator exactly like we did in Stage 1 but this time we’re going a step further!
The Door cards on most vehicles are horrible pieces of plastic that usually are made as cheaply as possible. In the picture above you can see the Silent Coat Absorber 15 fully fitted on one door card and factory spec on the other. Again, we go for as near total coverage as possible to really try and prevent any extra noise coming into the cabin and prevent the annoying Trim / Plastic rattles that can happen when upgrading speakers!
We’re using the same amount of 2mm Sound Deadening but then also adding in two large sheets of Absorber. Each sheet of absorber weighs approx. 680g. This combined with the Sound Deadening means we’re adding about 3.11kg per door and 6.22kg overall the vehicle weight.
If you’re already at this point, you must be keen on your audio so let’s crack on to Stage 3!
STAGE 3
- 2mm Sound Deadening – Outer Door Skin
- 2mm Sound Deadening – Main Door Regulator Panel
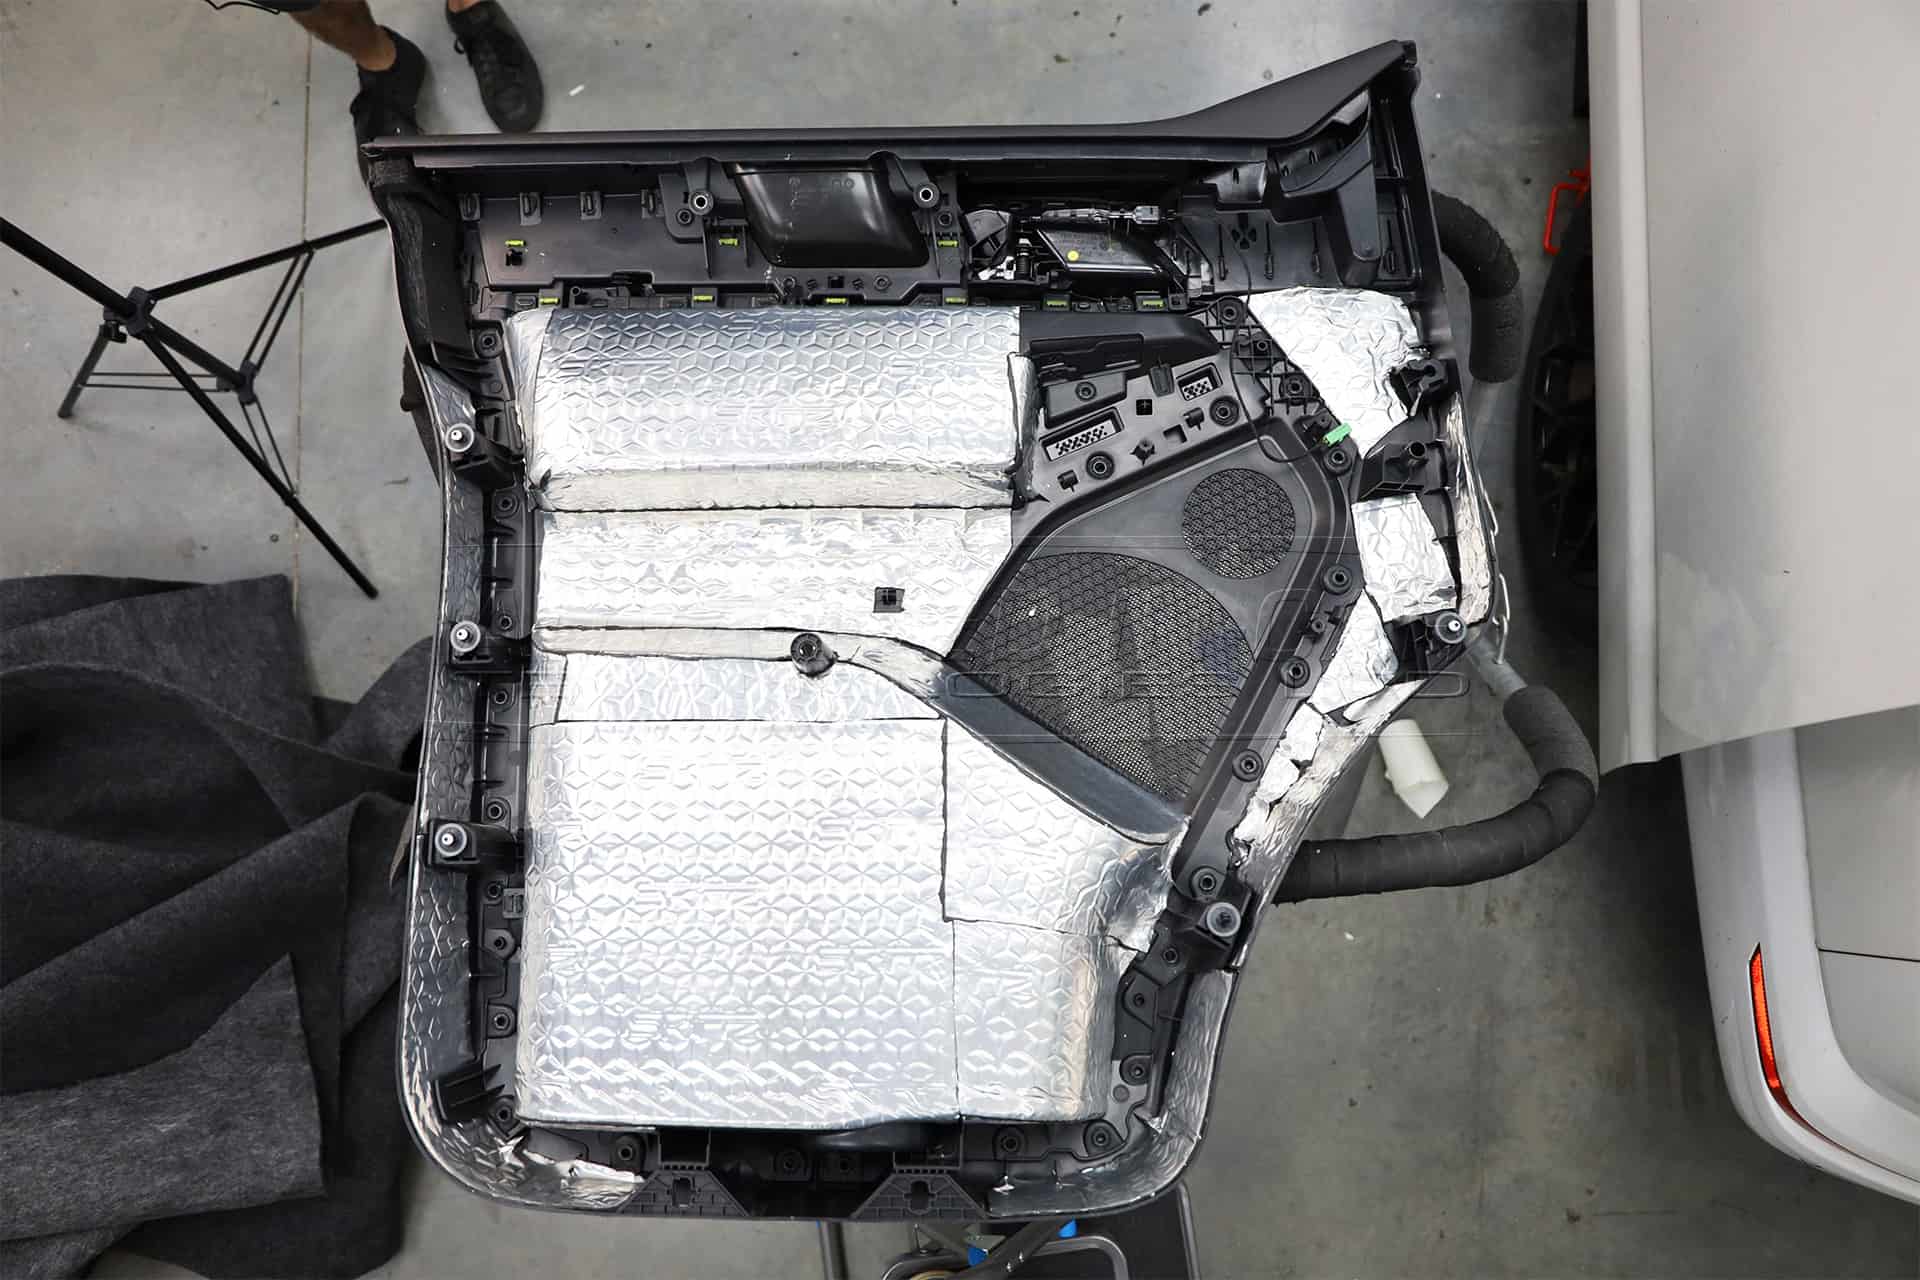
- 2mm Sound Deadening – Inside Plastic Door Card
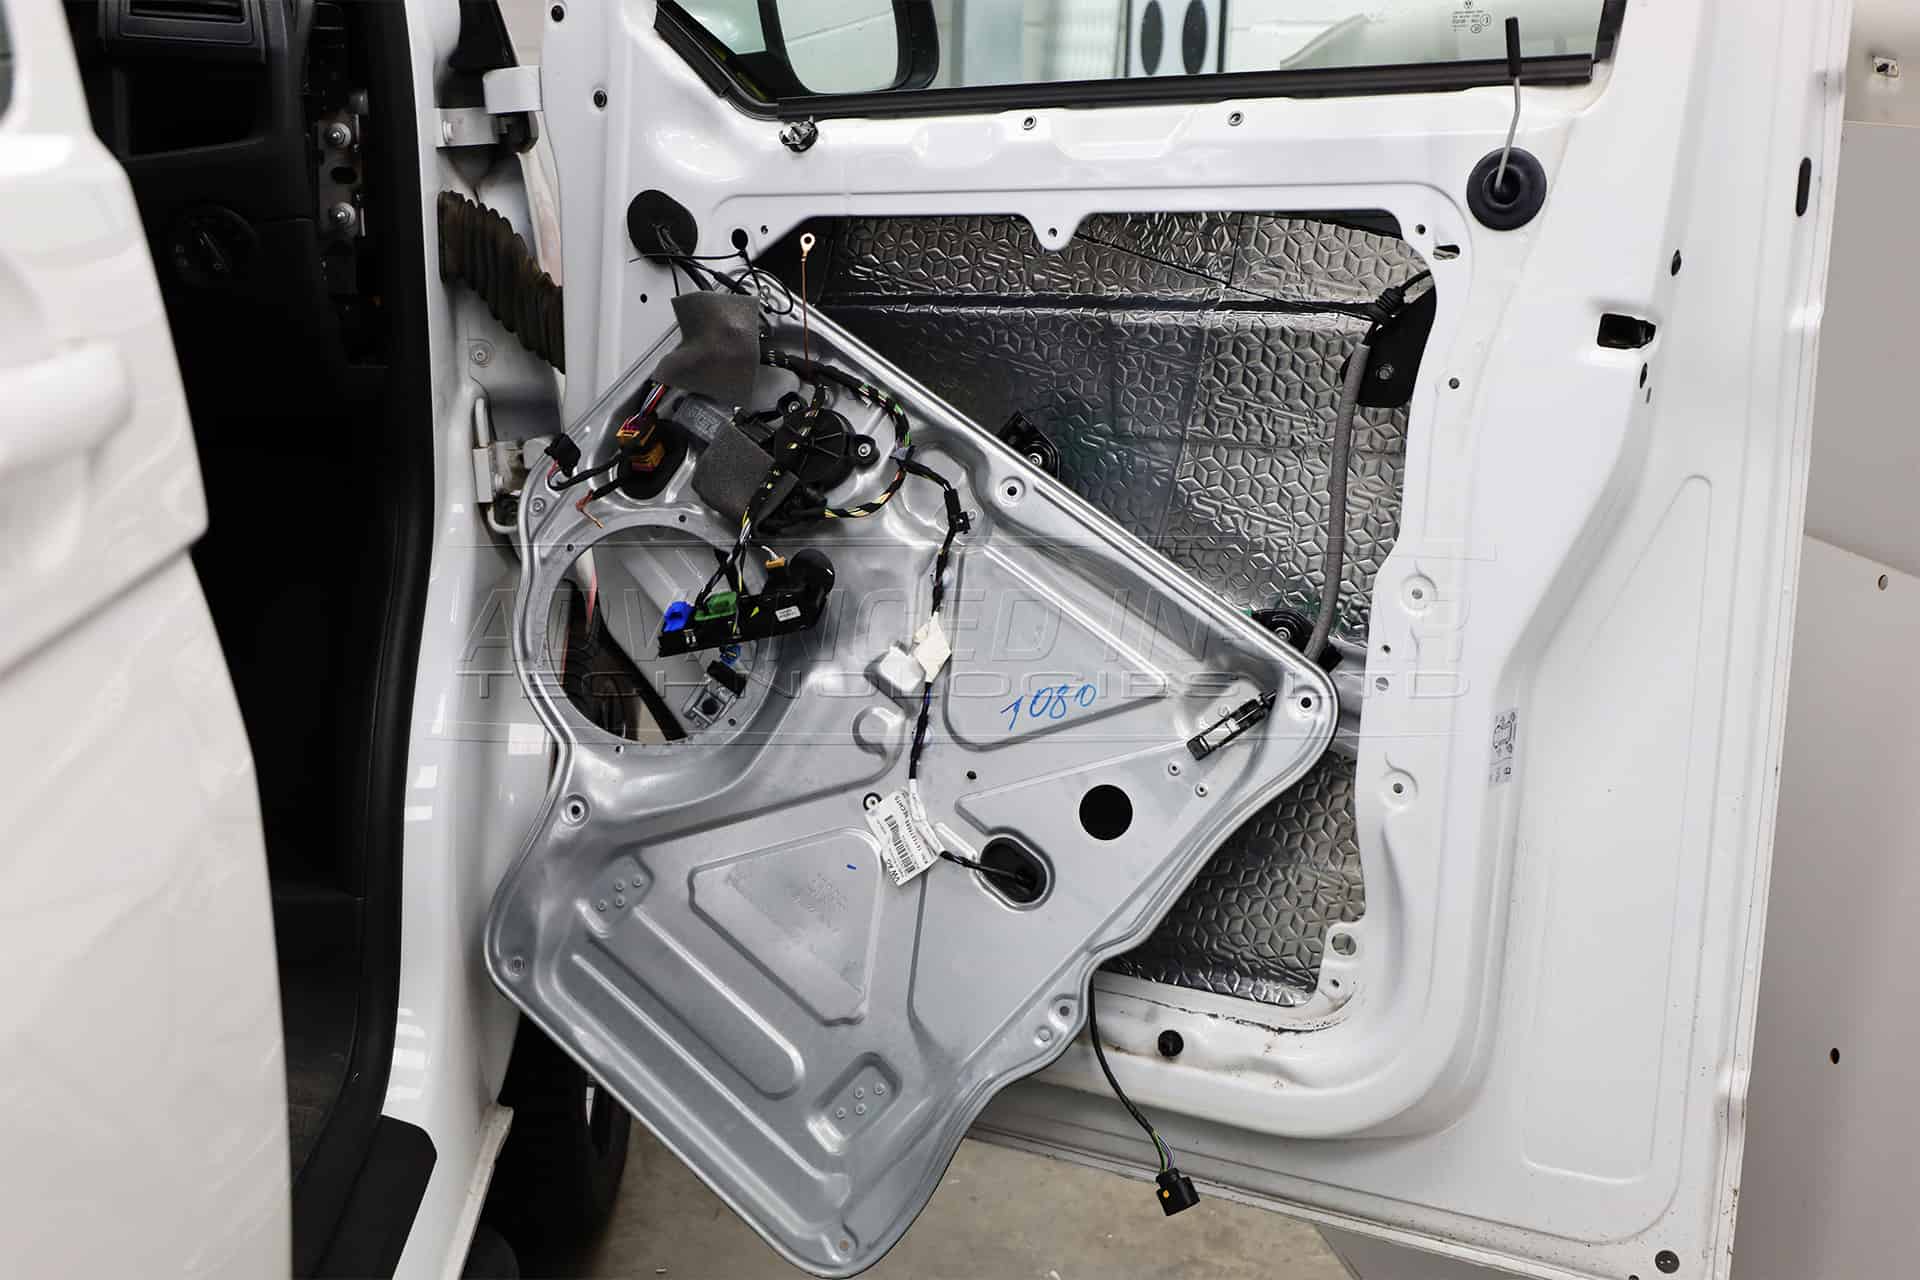

Like STAGE 1 we’re all about the 2mm Sound Deadening. First part of the process with this is adding a layer of sound deadening to the outer door skin panel (but the inside). To do this we have to release the regulator panel and secure the window glass out the way and remove the mechanism as much as possible to give us the biggest surface area to work with.
We pretty much cover the entirety of this panel to add an extra barrier that creates a much better area for the rear of the speaker to work in. This is twofold…
- It prevents unwanted sounds from the outside coming in and going through the new speaker cone and disrupting the sound waves. It also prevents general road noise coming into the cabin and the
- The rear of the speaker emits its own sound waves which can bounce off the metal door skin and then back into the speaker and again disrupt the audio.
With the Door Regulator panel back on, just like on Stage 1 we’re adding the same 2mm Sound Deadening sheets to this panel for the exact same reasons as mentioned previously.
Before we pop the door card back on to the main door, we’re giving this some 2mm treatment also. The main goal here is to really tighten this panel up and make it as solid as possible to really prevent any extra reverberations and any sound escaping from the sides of the speakers. Remember we want as much sound as possible to fire out of the cone and into the cabin!
This is belt and braces approach to ensure we’re covering as much surface area as possible with material.
Now to the stats…
As you already know, we’re using about 5 sheets of material for the Door Regulator Panel, the Outer door skin takes about 7 sheets, and the door card uses around another 5. Remember this is per door. At this point we’re looking at 5.95kg of extra weight per door and 11.9kg overall.
If you’re more of a Full Metal Jacket sort of person and only want the best, it’s time for Stage 4!
STAGE 4
- 2mm Sound Deadening – Outer Door Skin
- 2mm Sound Deadening – Main Door Regulator Panel
- 2mm Sound Deadening – Inside Plastic Door Card
- Sound Absorber – Inside Plastic Door Card

In the interest of saving space, I’ve not re-uploaded the same images as seen on STAGE 3 as the first three parts of 2mm sound deadening are done exactly the same for the exact same reasons.
The main difference is really pulling all previous stages together into one fully upgraded door environment.
Sound Deadening has already been done on the Outer Door Skin, Main Regulator Door Panel and the Inside Plastic Door Card but we’re now adding in the Absorber 15 on to the inside door card on top of the already laid 2mm sound deadening.
This really brings the front doors to the best possible environment “acoustically” for the new speakers that are being installed. We’ve deadened the doors to make them as tight and firm as possible, we’ve prevented any unwanted sounds coming in or out of the doors and we’re doing the best we possibly can to make sure the only thing firing out from the main speaker cone is the best possible sound that it can achieve!
The final count in terms of weight!
With all the Sound Deadening laid and the Absorber 15 we’re now looking at an extra weight of 7.31kg per door an overall weight increase of 14.62kg.
Like we’ve said before there will be 100 different ways to do your sound deadening and other companies will have their own ways and methods but as this is an important step and an investment into the audio of your vehicle it was well worthy of explanation.
If you want to upgrade the audio in your vehicle or improve the overall sound of your vehicle whilst driving don’t hesitate to get in touch!
The AICT Team


![IMG_7830 copy[89]](https://www.advanced-incar.co.uk/wp-content/uploads/2024/12/IMG_7830-copy89-scaled-600x462.jpg "IMG_7830 copy[89]")